ServiceNow - How do I set up my partner credentials for OAuth?
Last updated: April 22, 2026
Overview
This guide will walk you through how to create an Inbound Integration OAuth app in ServiceNow and enter your OAuth credentials in Merge.
Instructions
Step 1: Create an Inbound Integration OAuth app
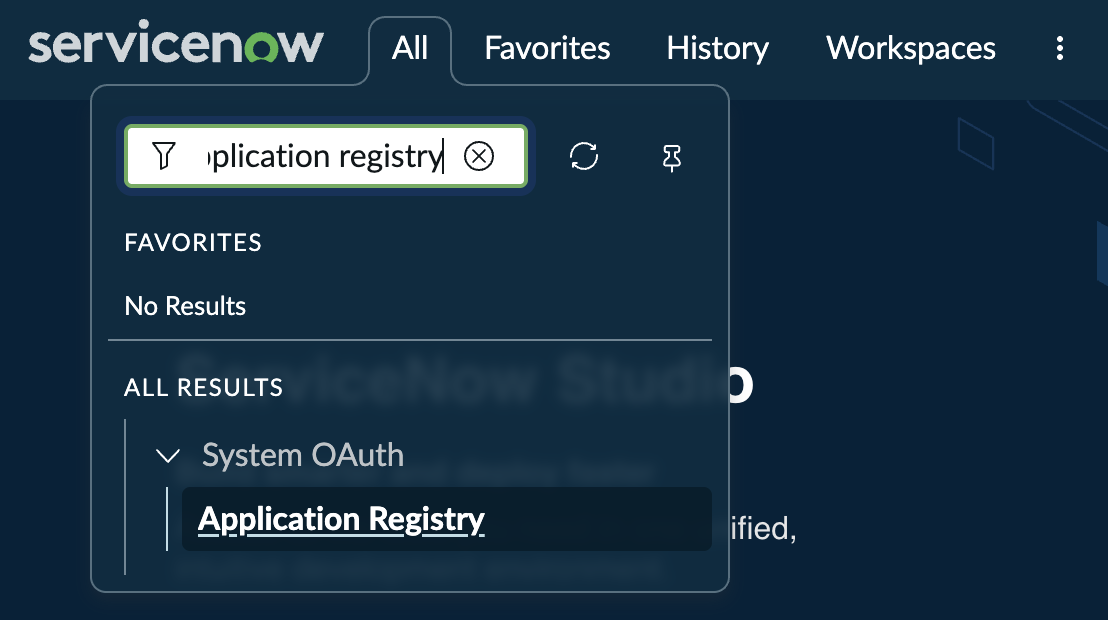
Log into ServiceNow. Click All in the top left corner, and search for Application Registry in the drop down menu.
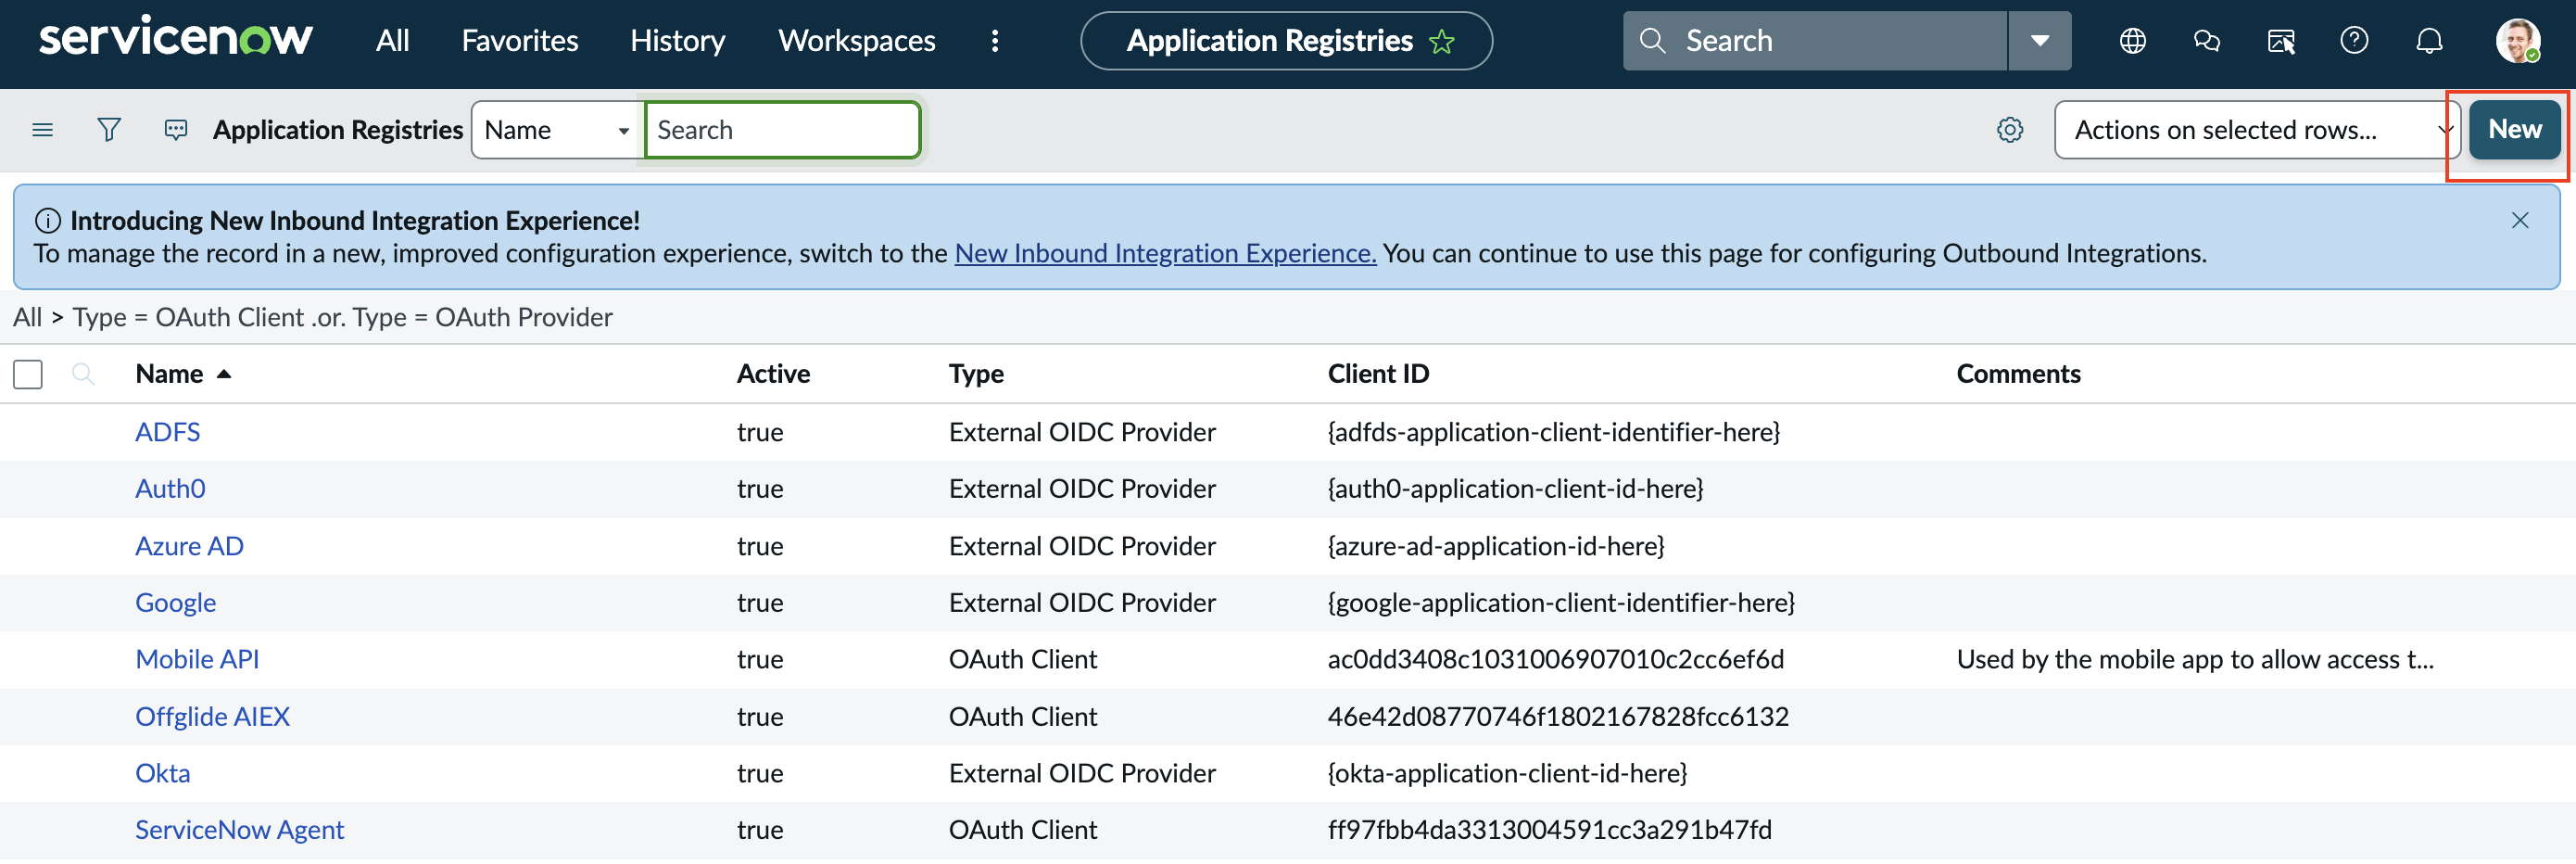
Within the Application Registries page, select New to begin the app creation flow.
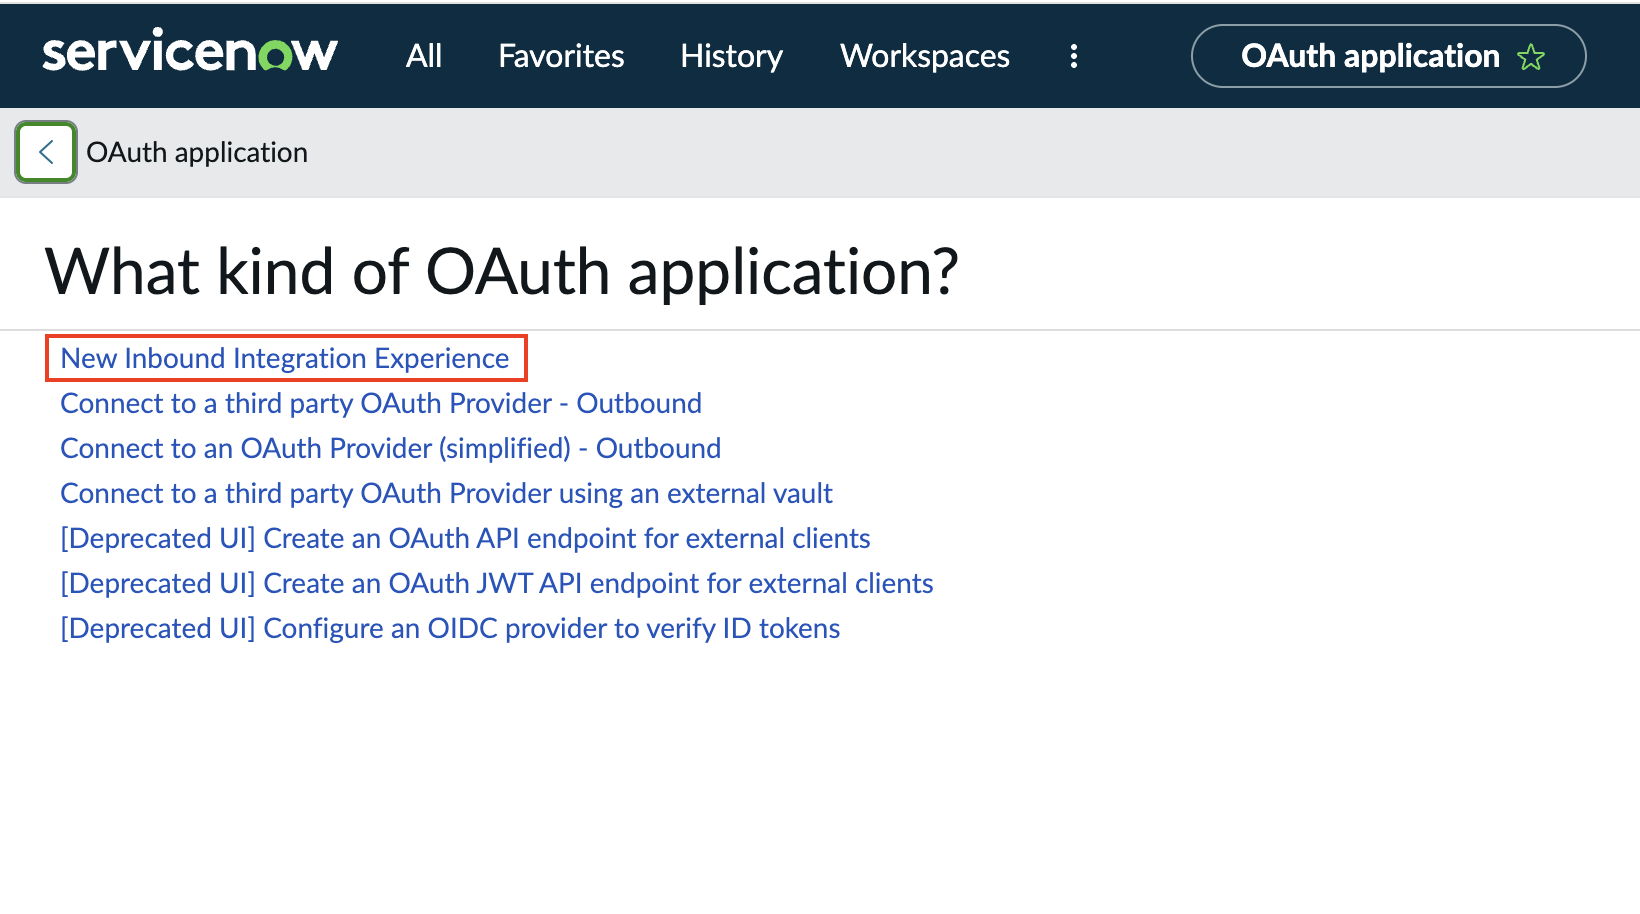
Select New Inbound Integration Experience.
In the Inbound Integrations page, select New integration.
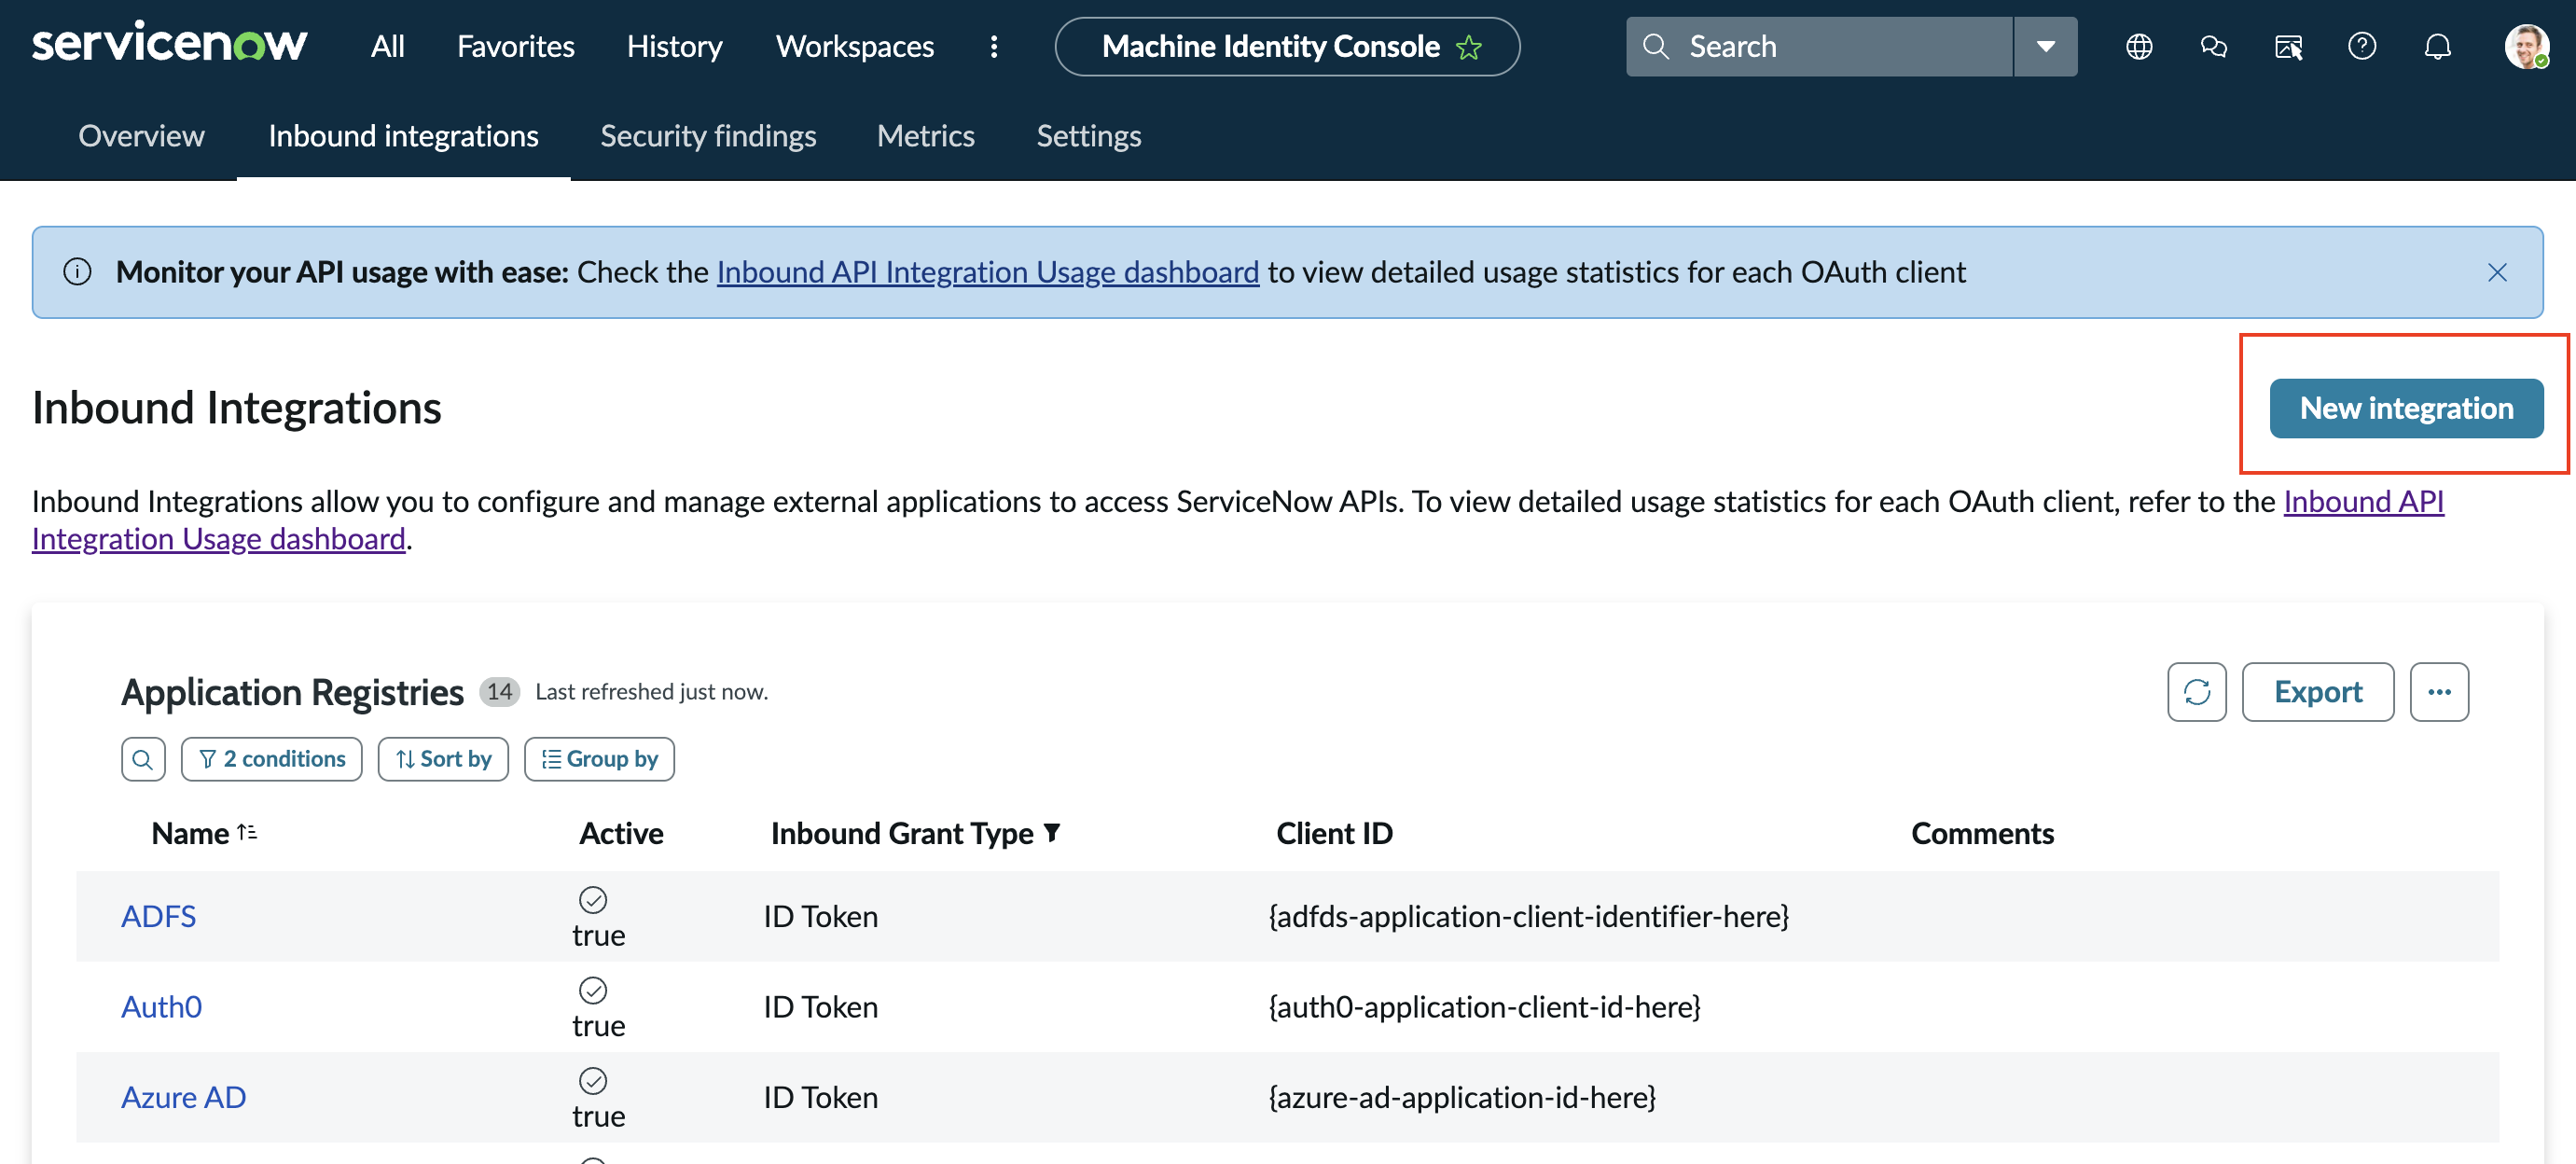
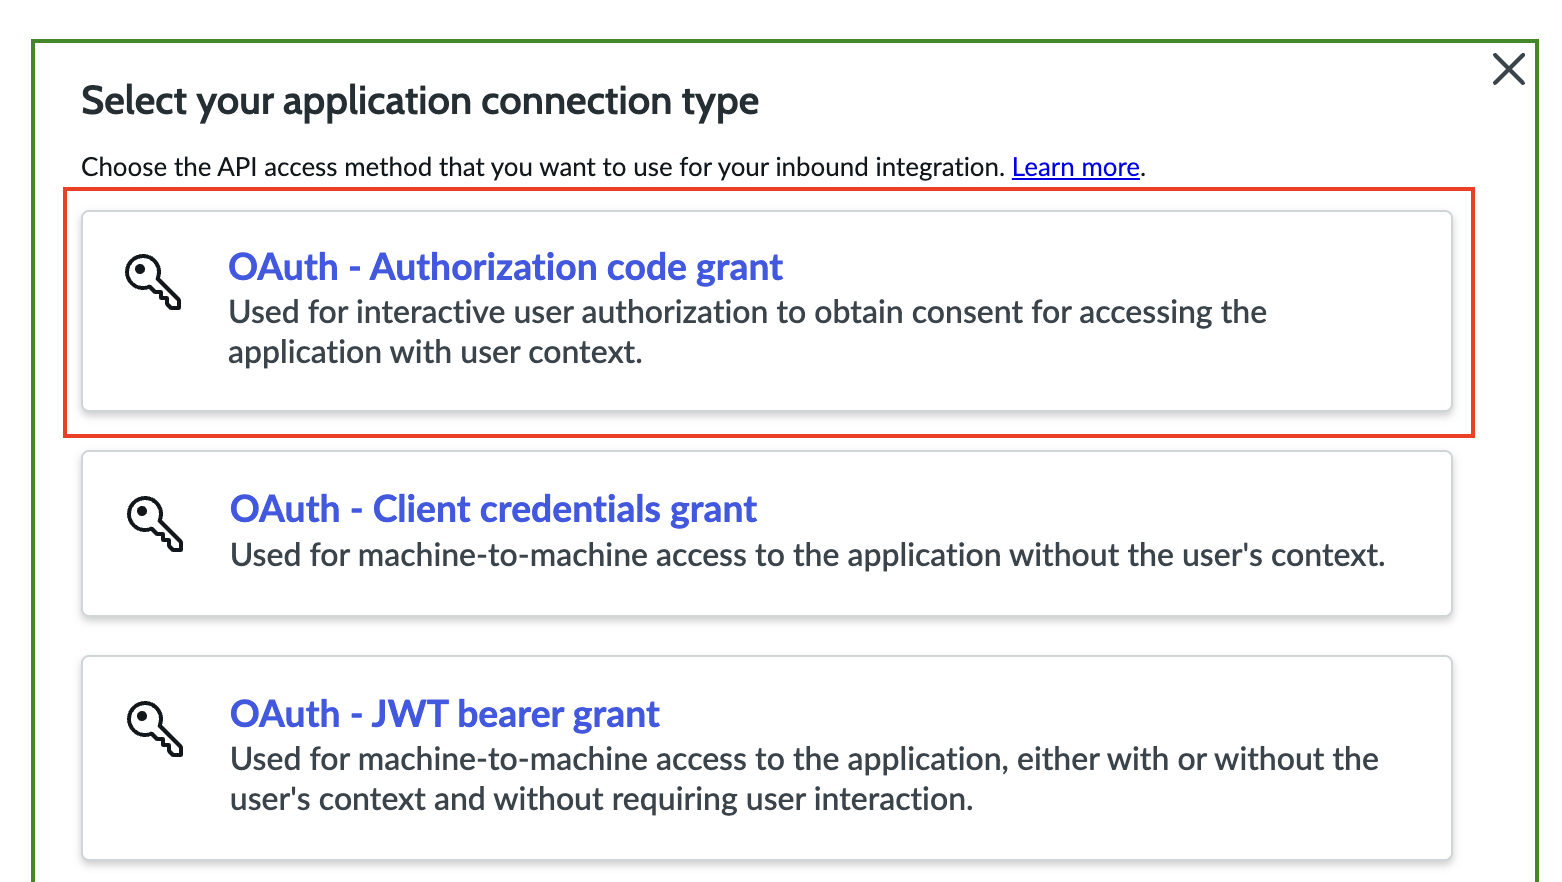
Within the Select your application connection type window, proceed with OAuth - Authorization code grant.
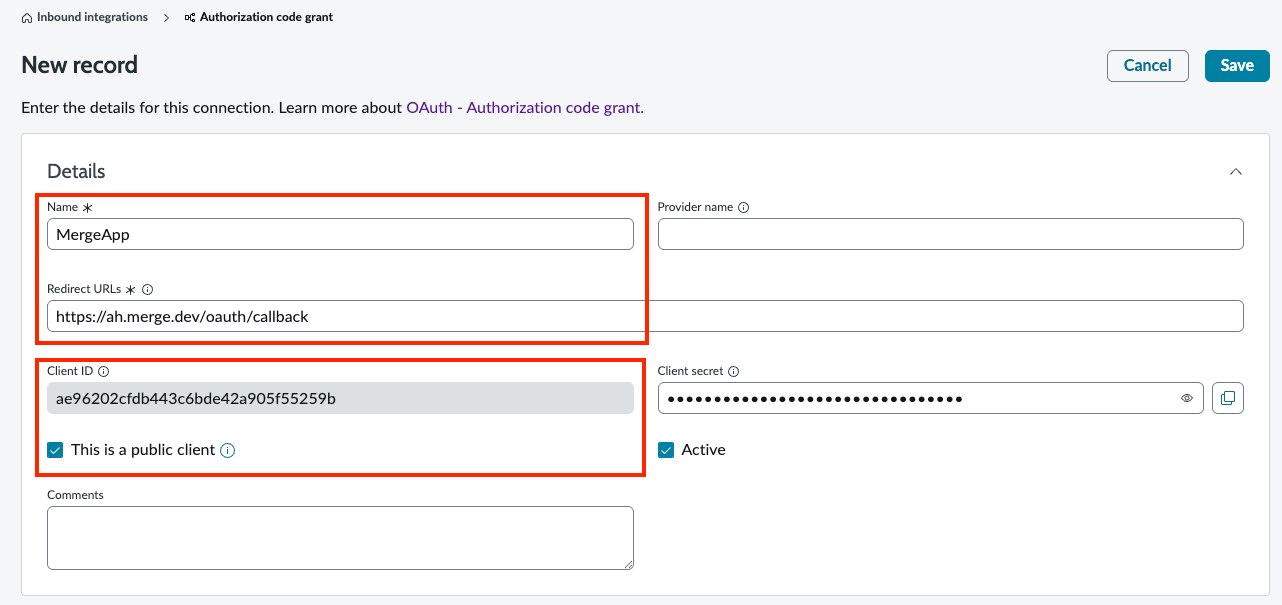
Enter a name for the App and input the Redirect URL as
https://ah.merge.dev/oauth/callback.Copy the Client ID. You'll need this later.
Select box for This is a public client, which initiates the PKCE flow.
Step 2: Enable OAuth settings
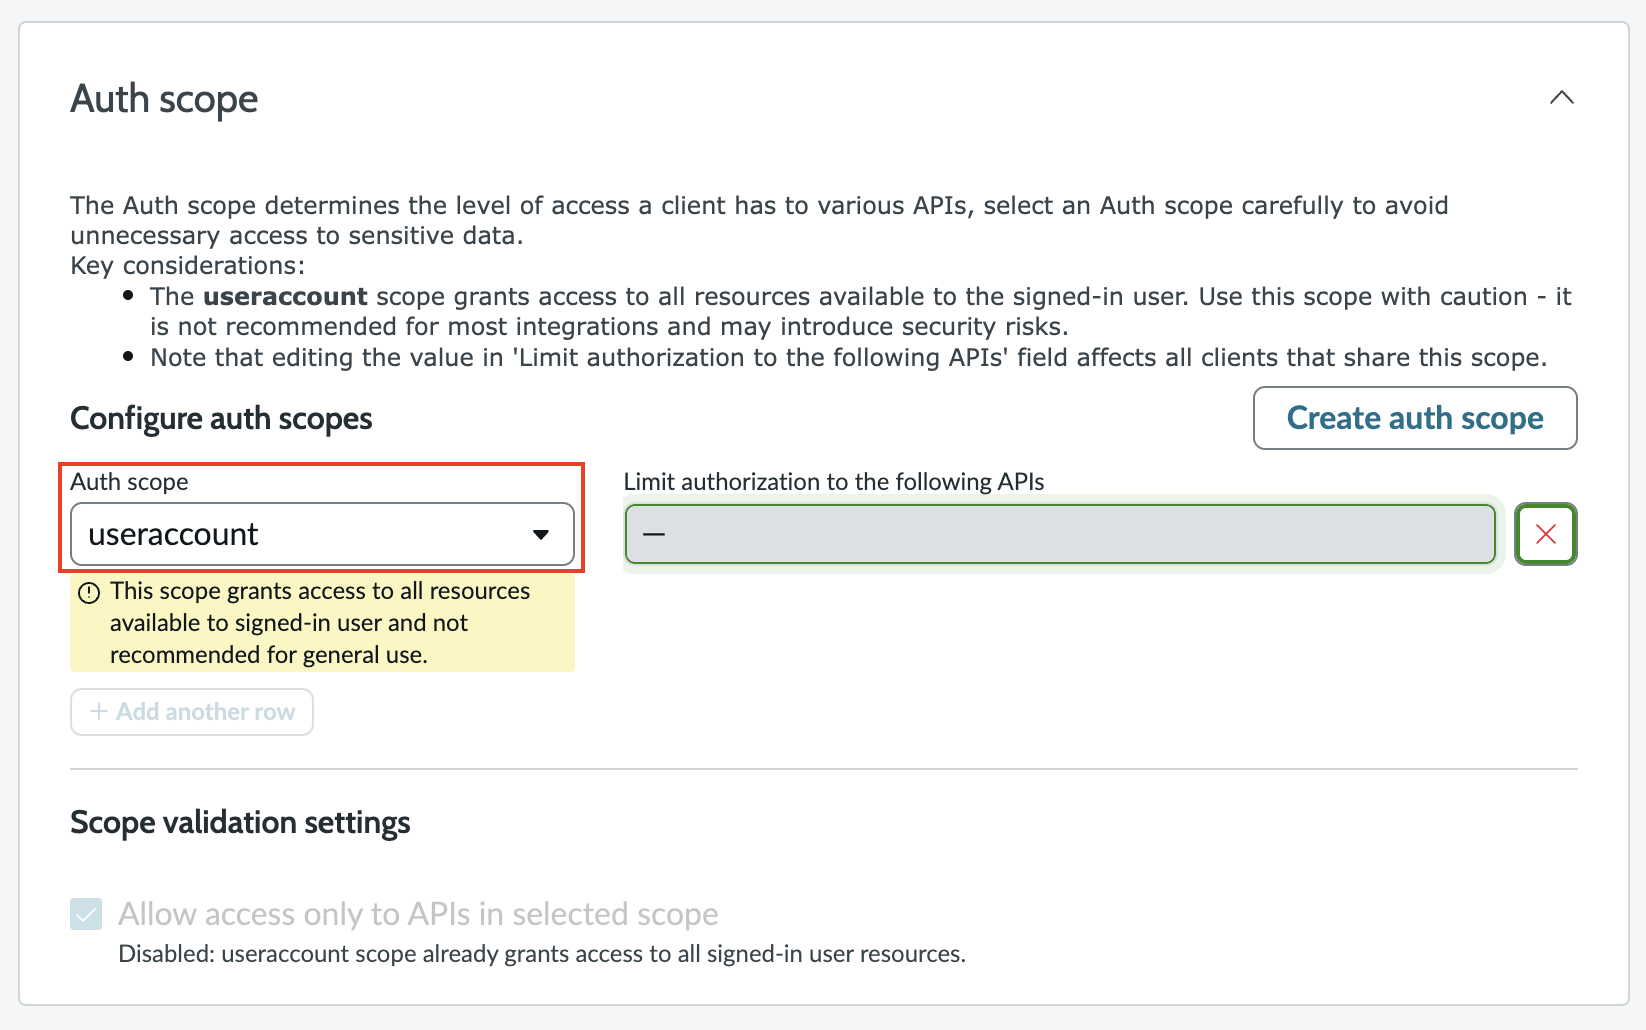
In the Auth scopes area of the page, configure your Auth scopes. Your options are either:
The default
useraccountscope. This grants the integration permission to whatever the authenticated user can access and perform.Configure a custom auth scope to limit access to read-only, write-only, etc. The below guide has more detail on that process.
Navigate back to the top of the page and select Save.

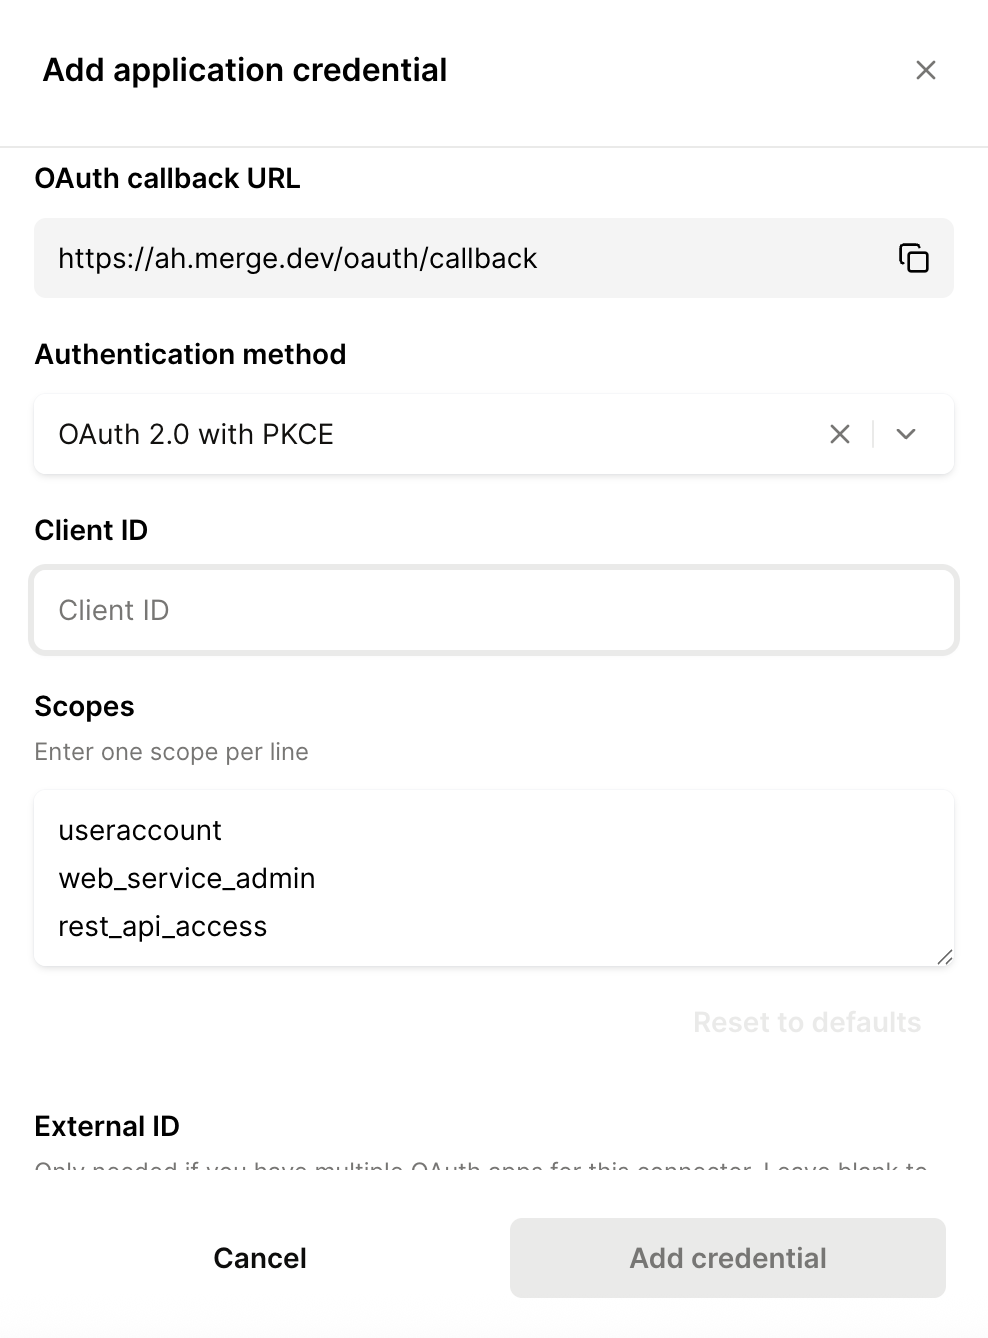
Enter the previously copied values for Client ID into the Merge Dashboard.