Jira - How do I set up my partner credentials for OAuth?
Last updated: January 29, 2026
Overview
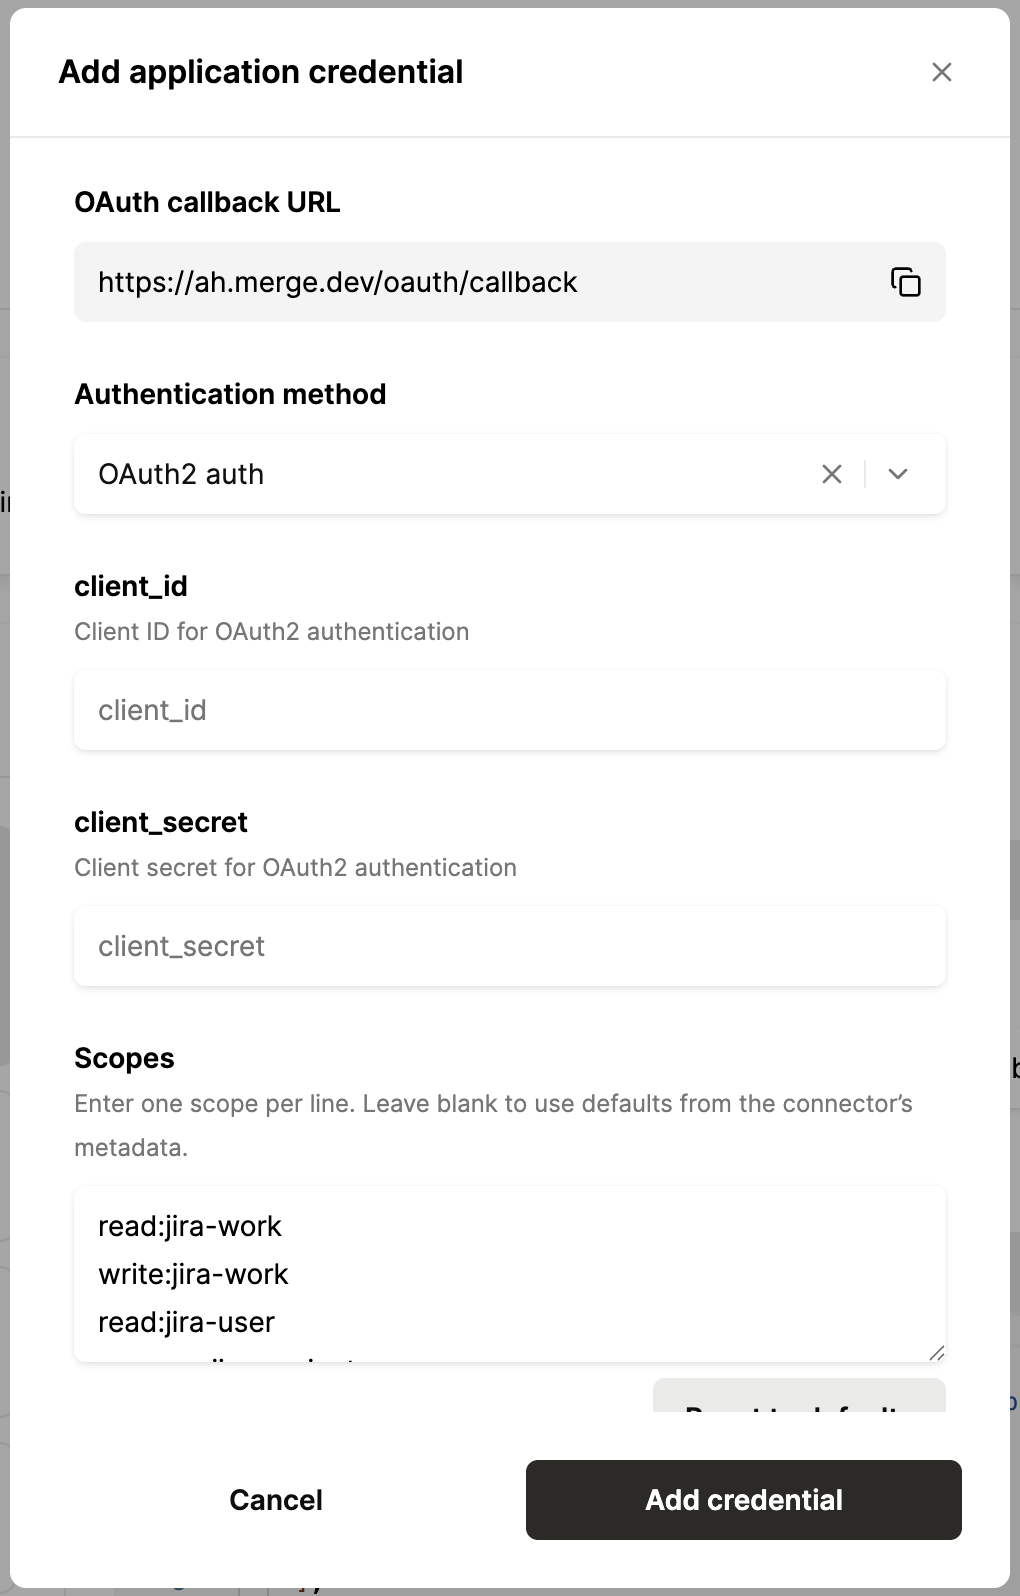
This guide will walk you through the steps generate your client credentials within Jira and input them into the Merge Dashboard. Please note that generating your own client credentials is not required for the Jira connector to work, but is required in order to use the OAuth2 flow.
Instructions
Step 1: Create a Jira app
Navigate to the Atlassian Developer console.
You must have an Atlassian developer account in order to create an OAuth application.
Select the "Create" button, and pick "OAuth 2.0 integration" from the dropdown.
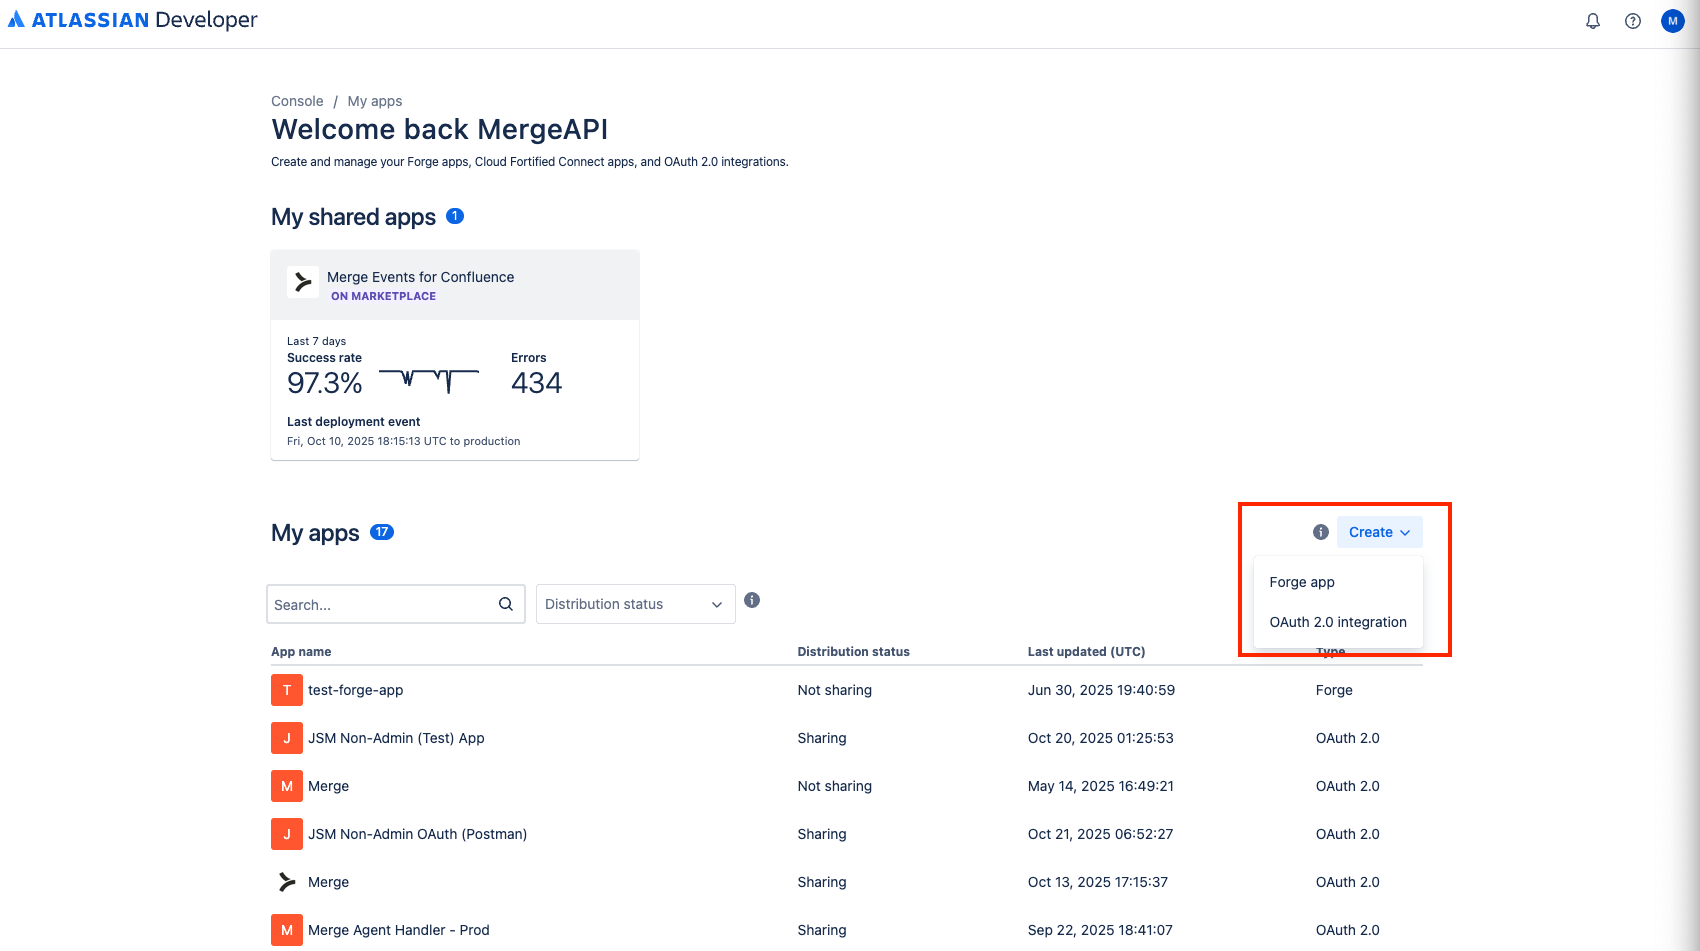
Complete the app creation form
App Name: give you app a name that references your business (e.g. "Acme Co Agentic Connector")
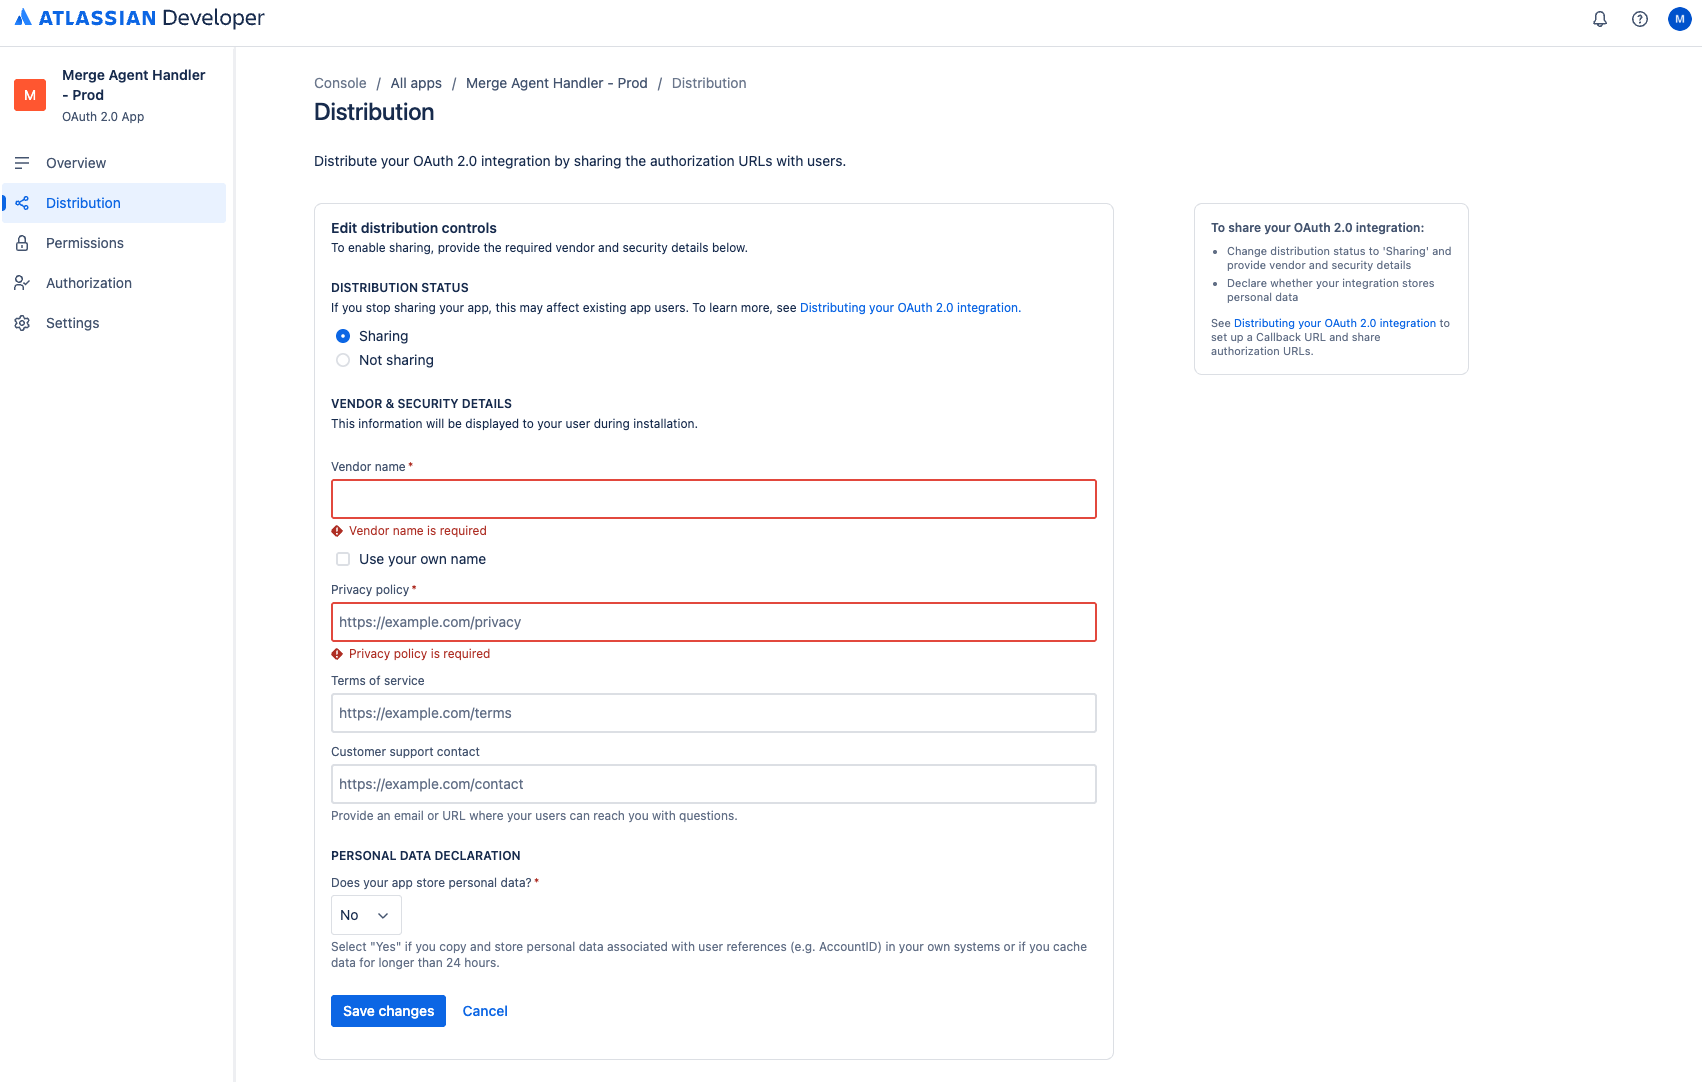
From the Distribution page
Set the distribution status to "Sharing"
For the Vendor Name, select "Use your own name"
For the "Privacy policy", "Terms of service", and "Customer support contact" fields, enter appropriate values for your organization.
Set the "Personal Data Declaration" setting to "No".
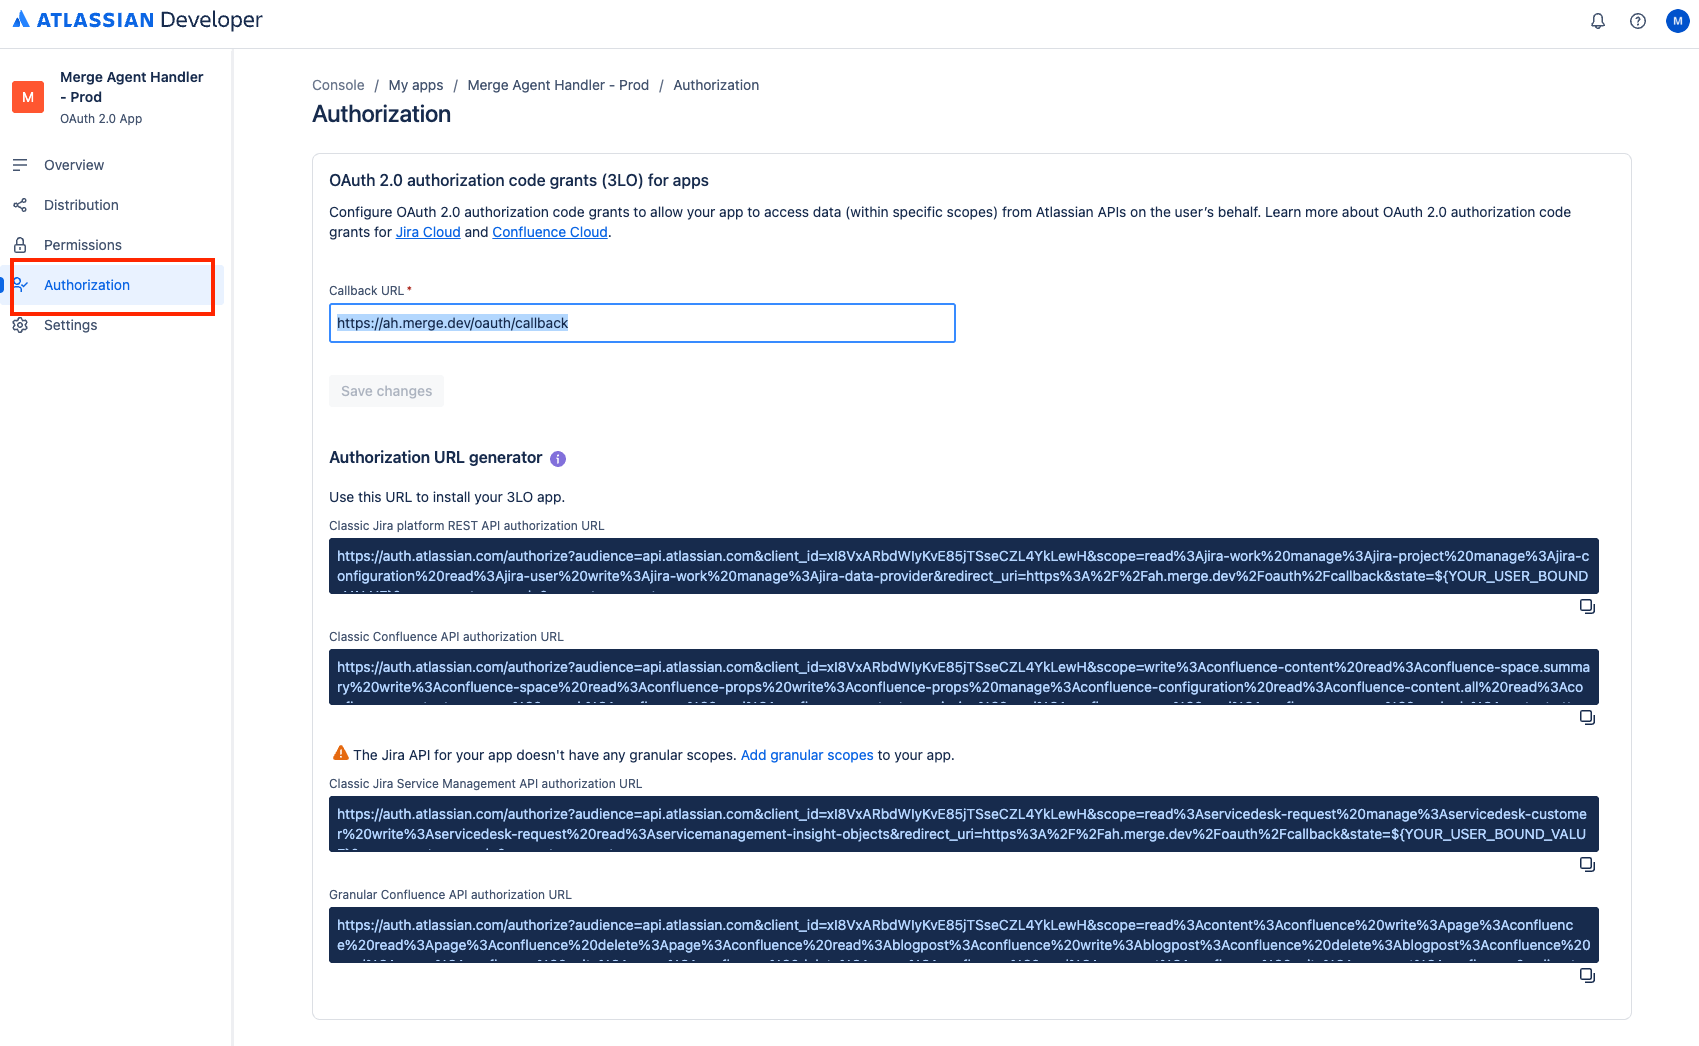
From the Authorization page
Set the Callback URL "https://ah.merge.dev/oauth/callback"
From the Permissions page
Select "Add" for the Jira product
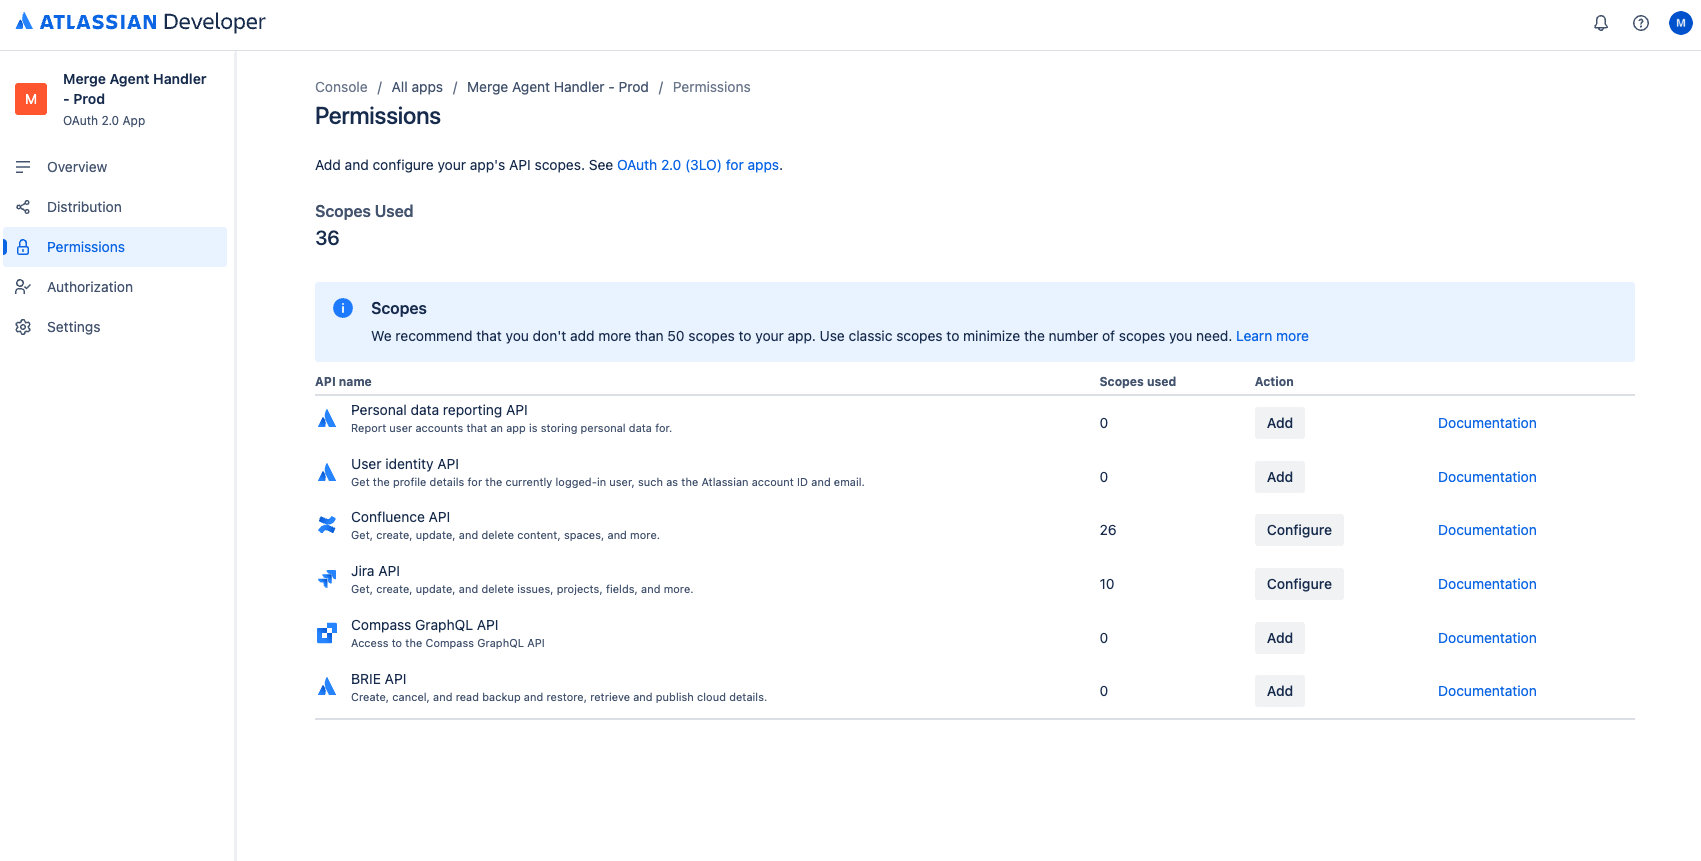
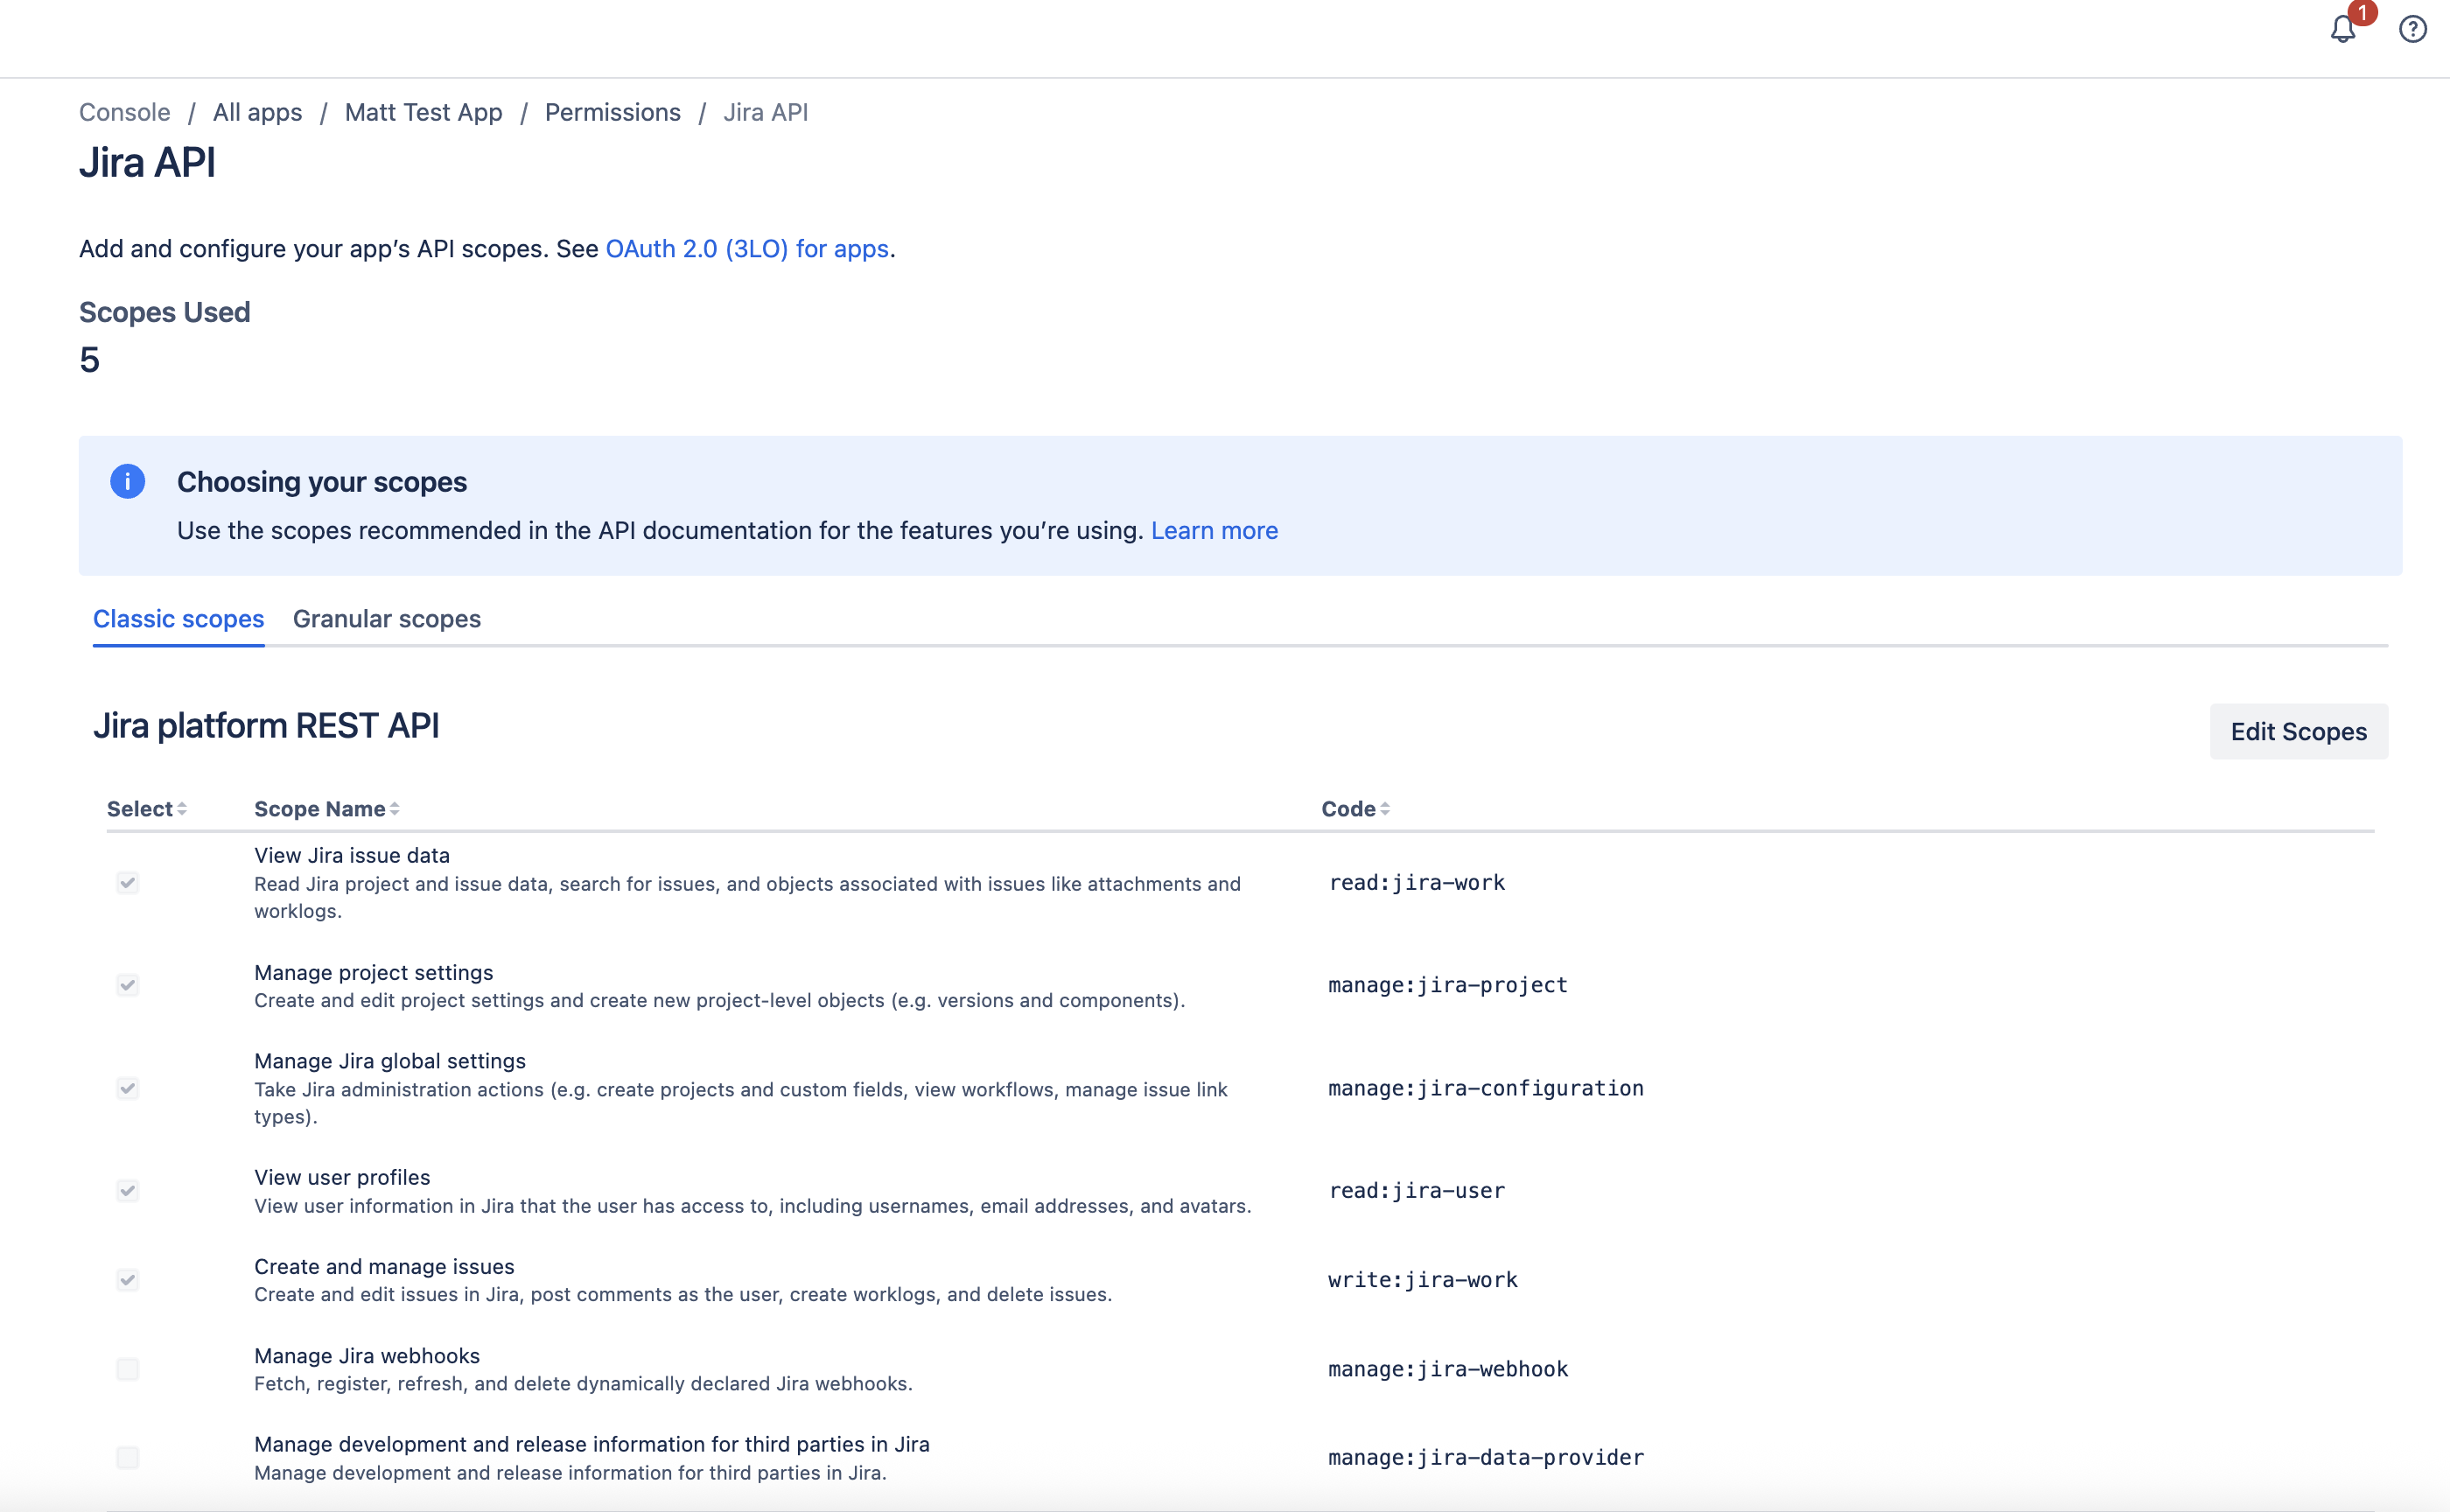
Select the following scopes:
View Jira issue data
Manage project settings
Manage Jira global settings
View user profiles
Create and manage issues
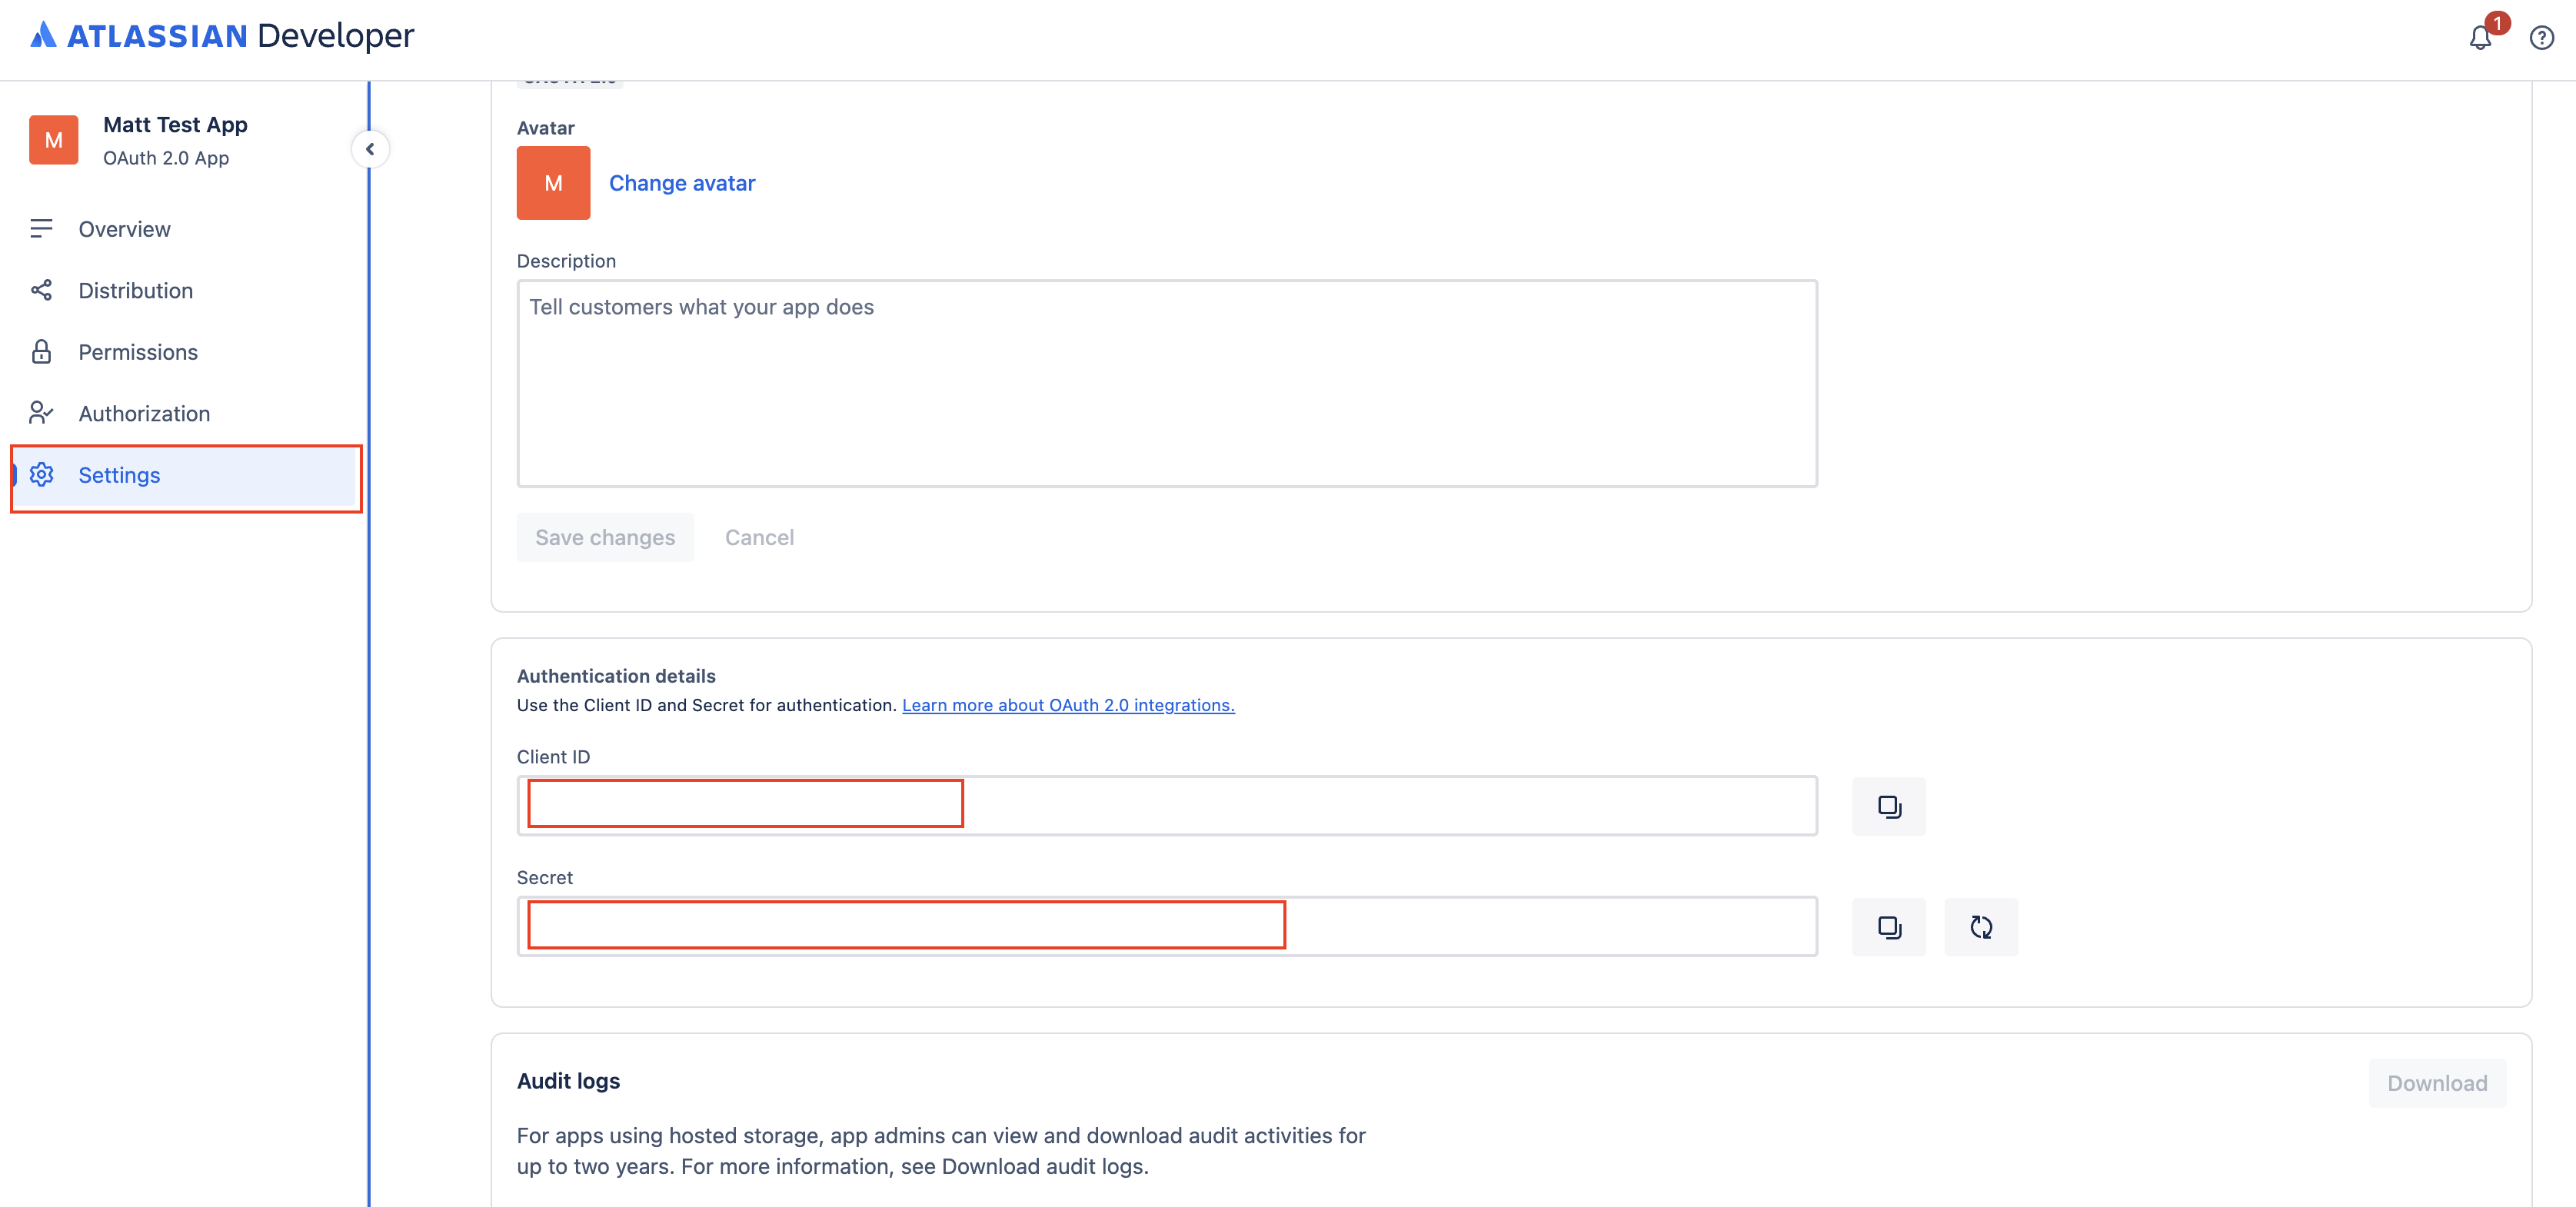
Navigate to the settings page
Copy your client ID and secret
From the Agent Handler Connectors page, add your client ID and secret to the Jira connector by clicking the "+ Add connector" button