ServiceNow - What options do I have for scopes?
Last updated: April 15, 2026
Overview
This guide will walk you through the required OAuth scopes for your use case. You have two options:
Fully inherit the permissions of the authenticated user
Configure a custom read-only or read+create scope
Inheriting the permissions of the authenticating user
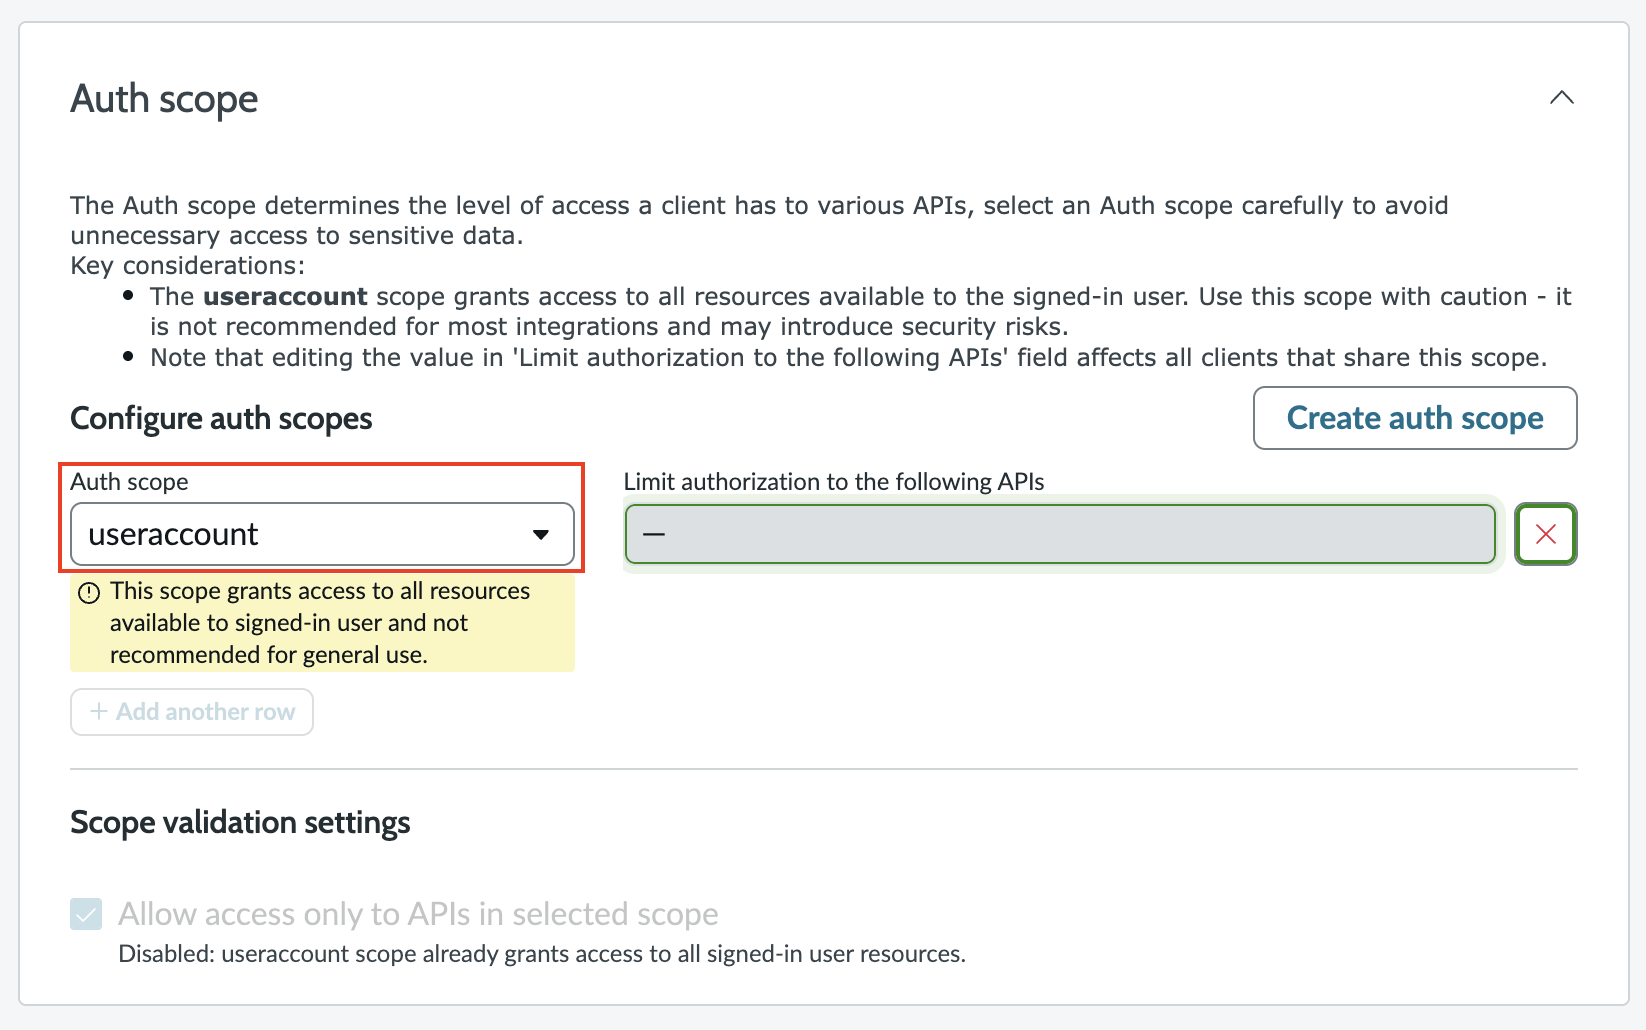
If you want your integration to inherit the permissions of the authenticating user, use the default useraccount scope. This scope simply allows an application to act on behalf of that user to retrieve/access data that the user already has access to.
Configuring a custom scope
By configuring a custom REST API Auth Scope, you'll be able to set up read-only or read+create scope. Permissions will still inherit from the authenticated user (they won't be able to interact with tables they are not able to interact with in the UI), but this will allow you to limit the operations available.
Steps to configure a custom REST API Auth Scope
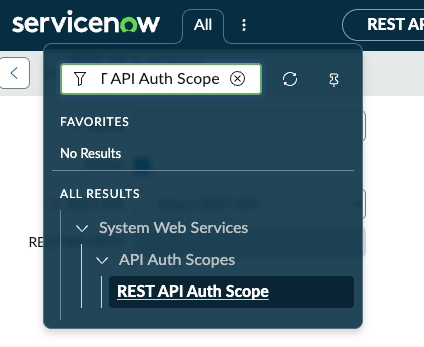
Navigate to System Web Services > API Auth Scopes > REST API Auth Scope
Begin creating a new REST API Auth Scope by selecting New in the top right of the page.
Uncheck the Apply auth scope to all http methods in this API and Apply auth scope to all resources in this API checkboxes
Fill in the below fields
Name: any name to remember the scope
REST API: Table API
HTTP Method:
for read-only: GET
for create-only: POST
for update-only: PATCH (also create another Scope for PUT)
for delete-only: DELETE
Resource: /now/table/{tableName}
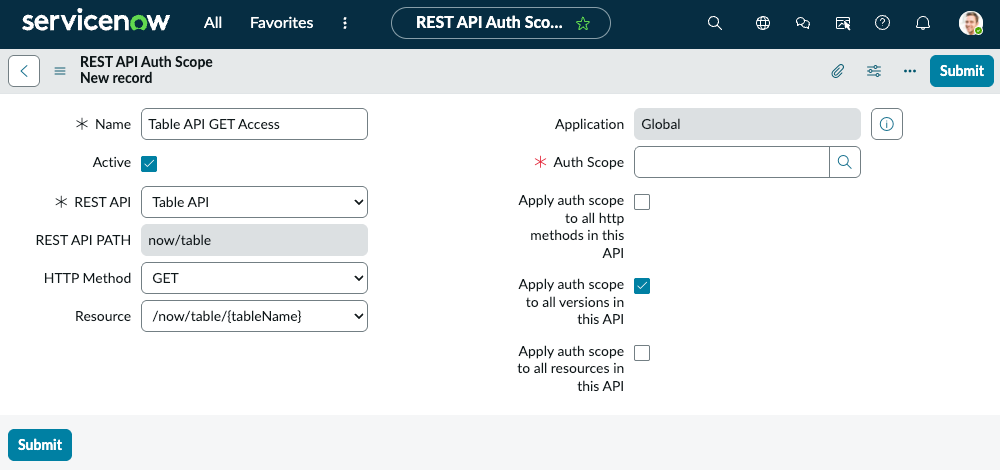
Select the search icon next to Auth Scope
A pop-up will upon. Select New in the pop-up.
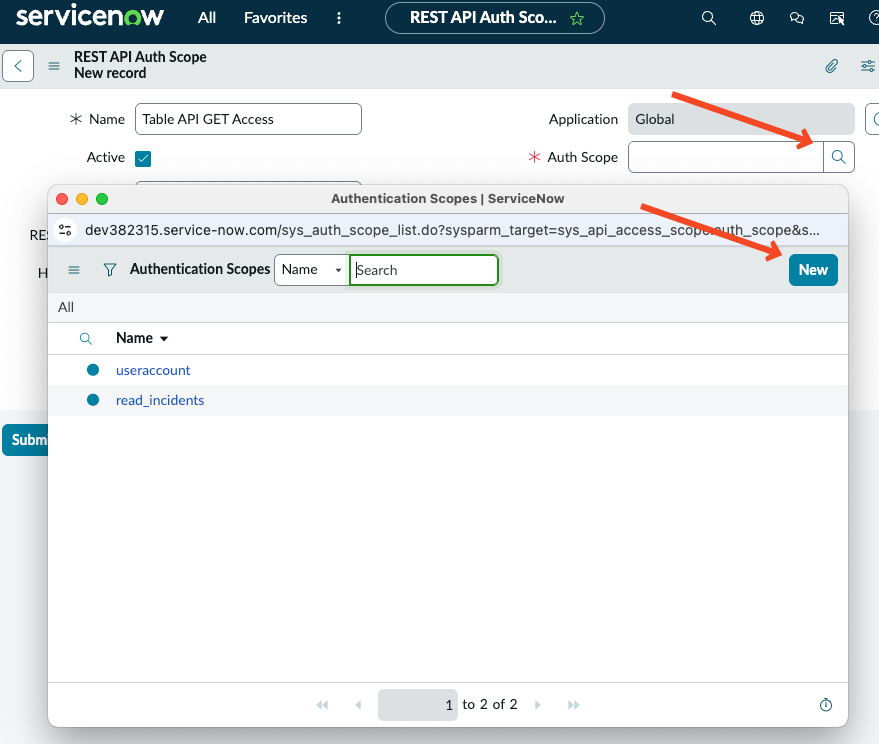
Give your scope a name that you'll remember (i.e. table_read_access) and click Submit
After all the information is entered, click Submit.
Repeat the above steps for any other operation (i.e. create). You can then use these scopes when creating your OAuth application! See the below example.