Atlassian (Confluence/Jira) - How do I set up my partner credentials?
Last updated: April 3, 2026
Overview
To allow your customers to link Atlassian products (Jira, Jira Service Management, and Confluence) with Merge, you will need to set up an Atlassian OAuth App and enter your applications credentials within the Dashboard.
Instructions
Step 1: Sign up for Atlassian
If you do not yet have an Atlassian account, create one at https://id.atlassian.com/signup
Step 2: Create an Atlassian app
Log in to your Atlassian Developer account and navigate to https://developer.atlassian.com/console.
Click Create, and select OAuth 2.0 integration
Name: This should be your application's name. When your users link their Atlassian product, they will see that "Name" is requesting to integrate with their specific Atlassian product.
Step 3: Configure your Atlassian app's settings
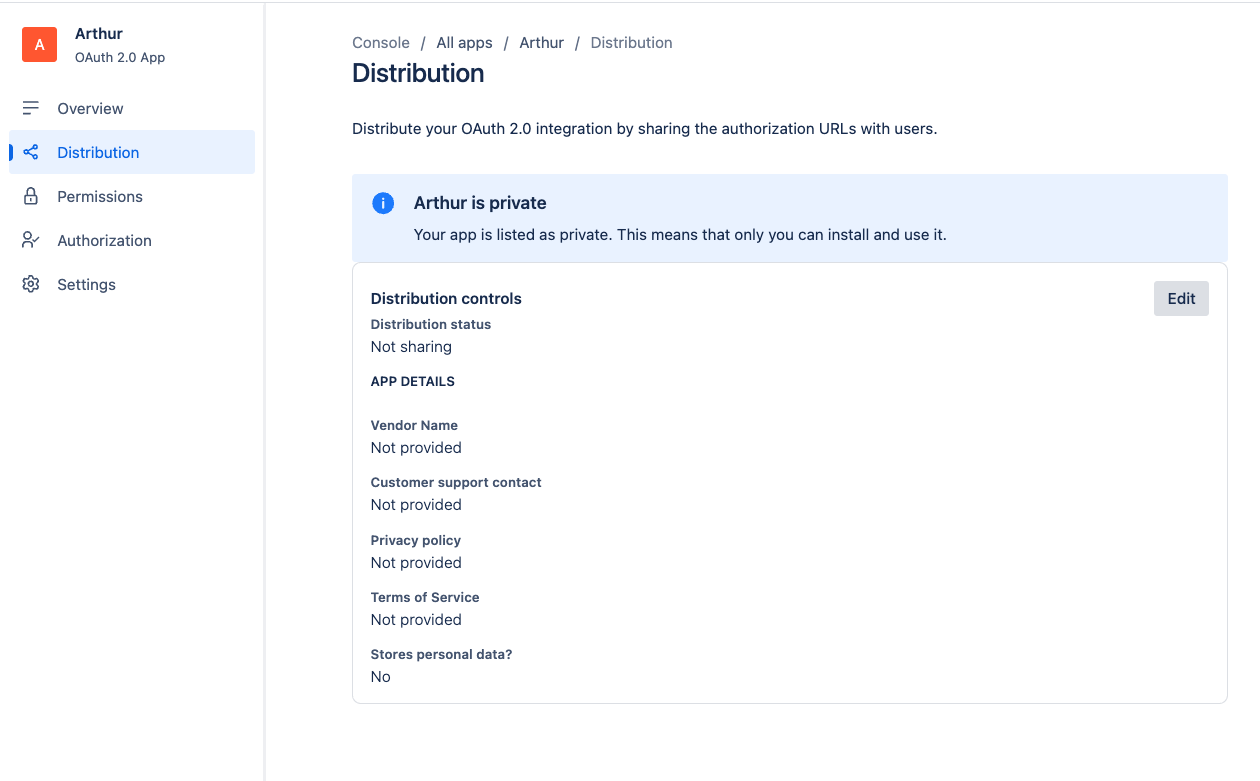
In the menu on the left hand side, click the Distribution tab
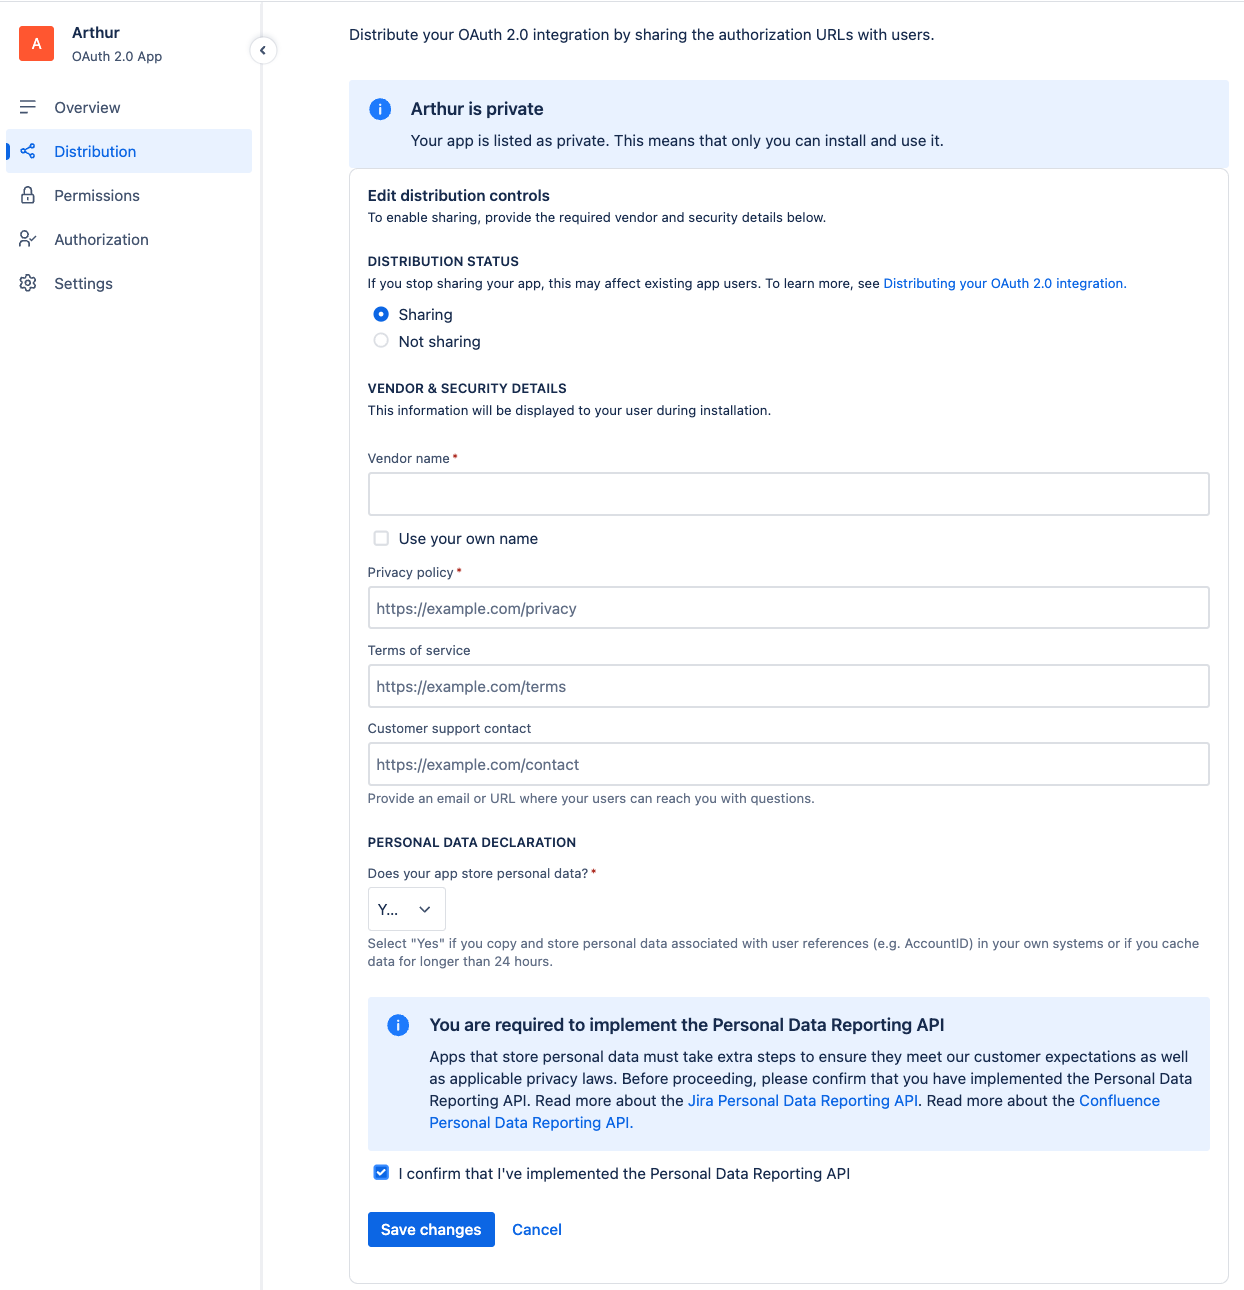
Click Edit
Set the Distribution Status setting to Sharing
Under Vendor name, enter your company name
Under Privacy policy, enter the URL to your company's privacy policy
If you require Groups and Users for your use case, this next step is required.
Set Personal Data Declaration to Yes
Check I confirm I have implemented the Personal Data Reporting API. Merge's Jira, Jira Service Management, and Confluence integrations implement the Personal Data Reporting API.
Click the Permissions Tab
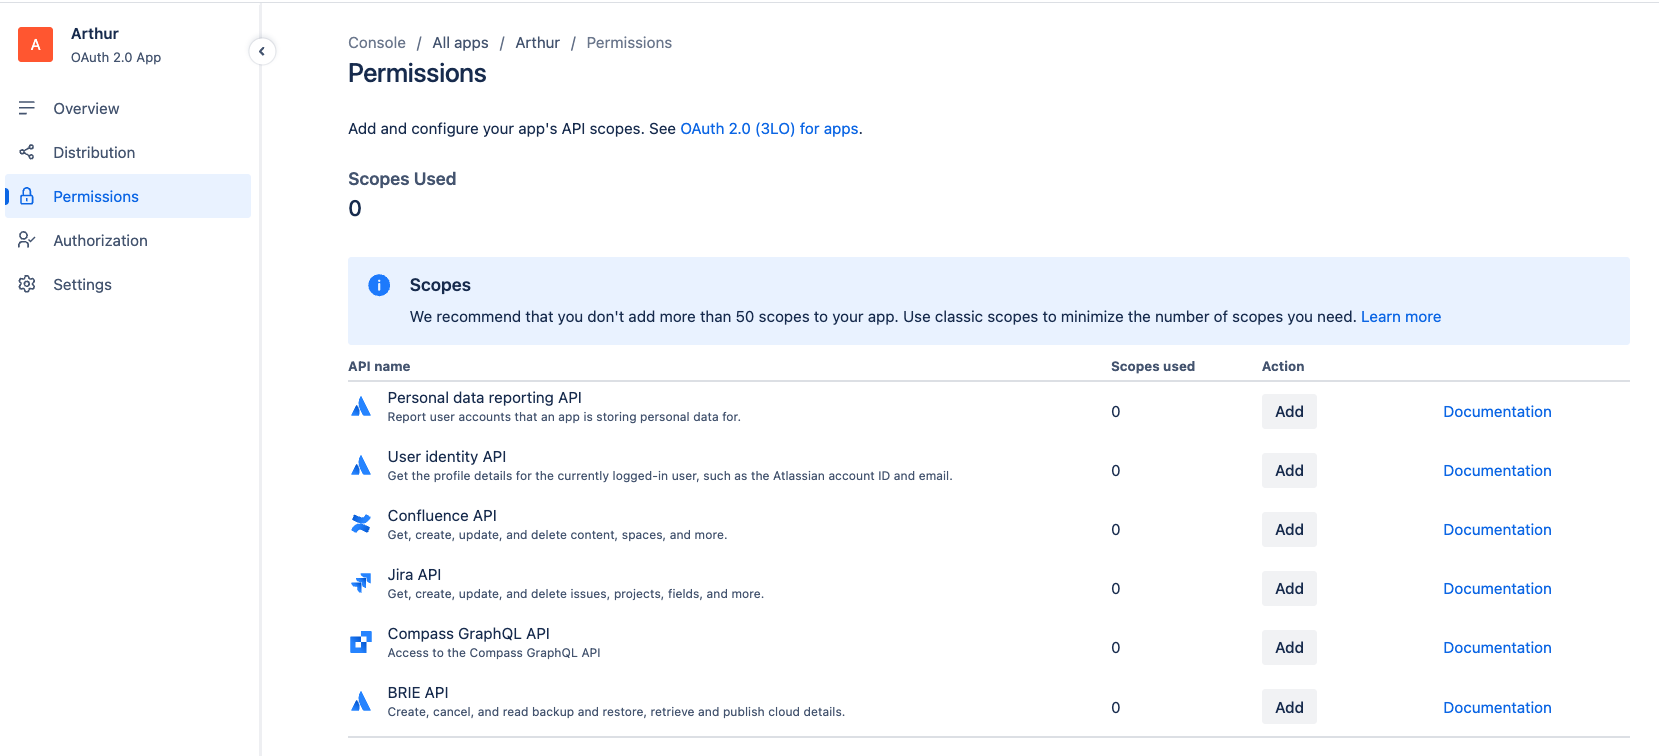
Enable access to Personal data reporting API
In the Personal data reporting API row under the Action column, click Add button, then the Configure button.
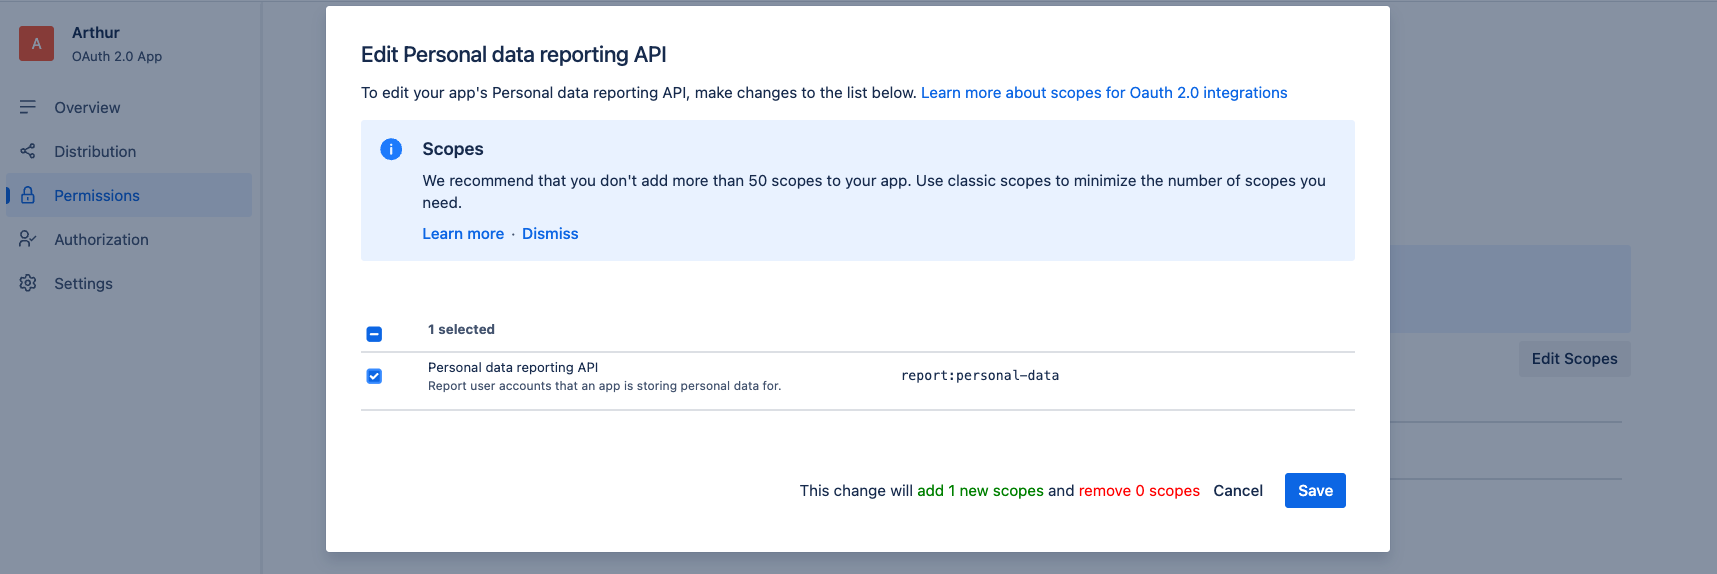
Click Edit Scopes
Check the Personal data reporting API scope
Click Save
Set scopes per application
In the corresponding Application row (Jira API / Confluence API) click the Add button in the Action column, then the Configure button.
Set the following scopes to enable access for all Merge Common Models. You may choose to remove scopes if not needed for your use case.
Confluence
Jira & Jira Service Management
Classic scopes
read:confluence-space.summaryread:confluence-content.summarysearch:confluenceread:confluence-userread:confluence-groupsreadonly:content.attachment:confluence
read:jira-workmanage:jira-projectmanage:jira-configurationread:jira-userwrite:jira-workmanage:jira-webhook
Granular scopes
read:space:confluenceread:audit-log:confluenceread:configuration:confluence
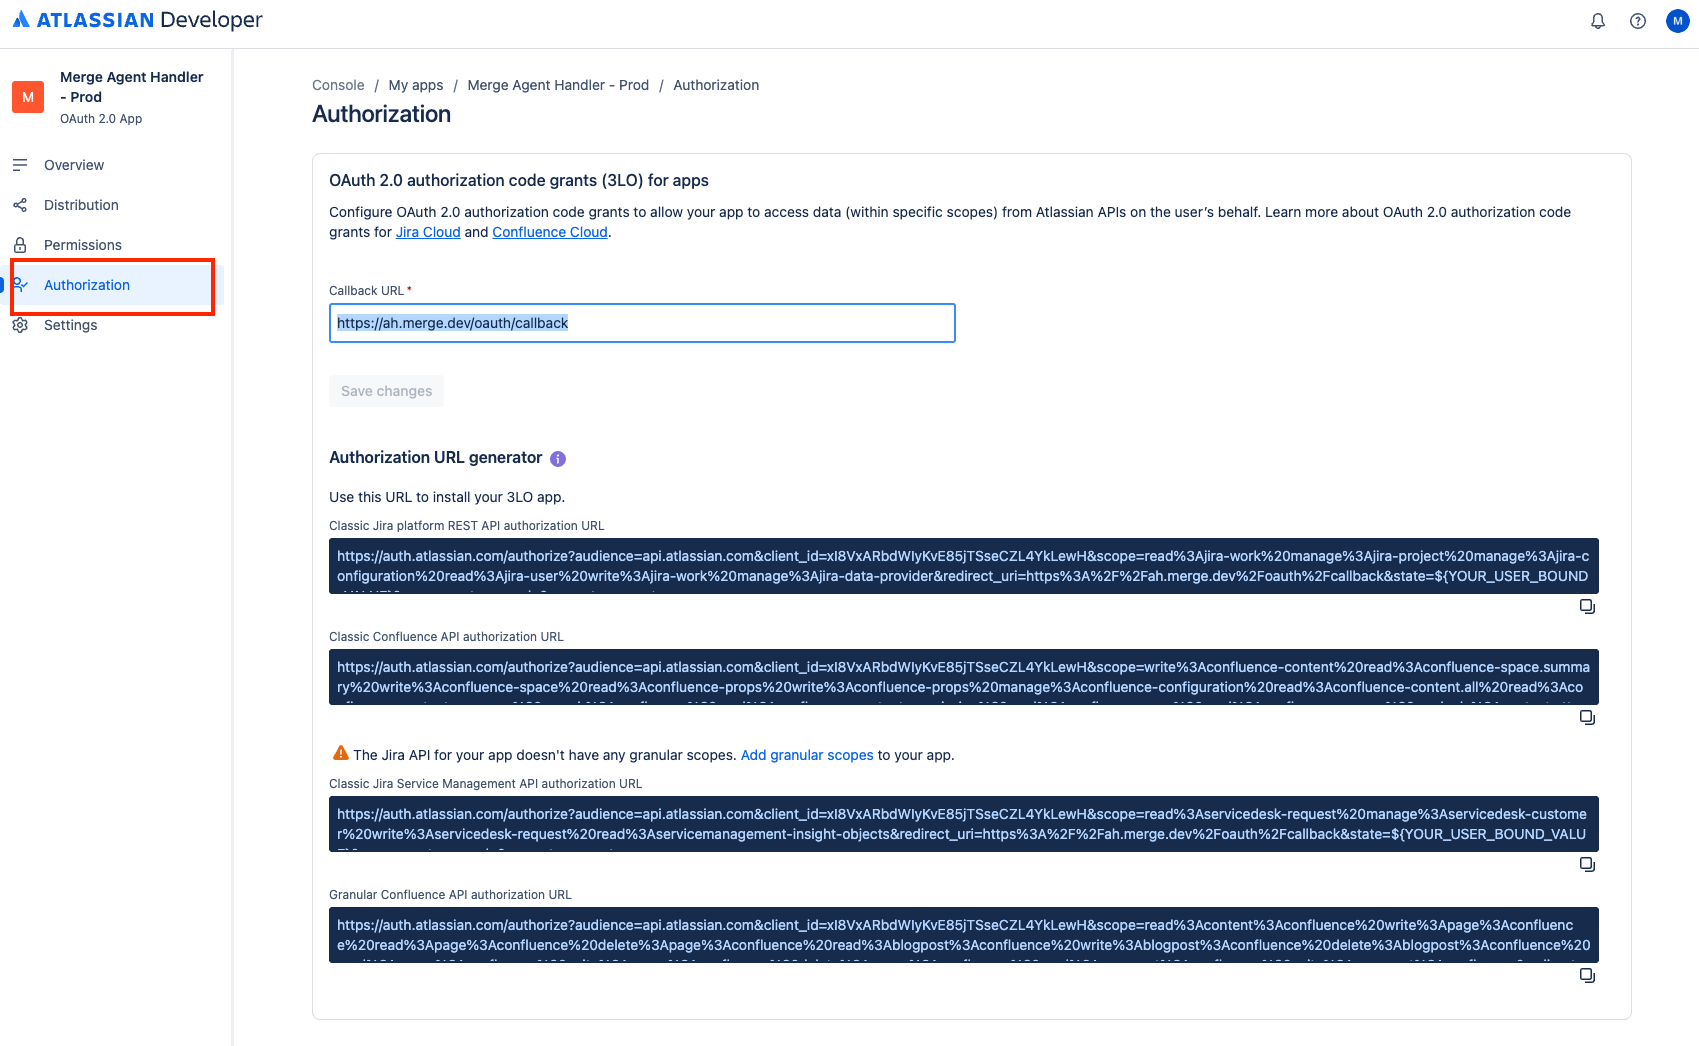
Click the Authorization Tab
In the OAuth 2.0 (3LO) row under the Action column, click Add button, then select the Configure button.
Enter
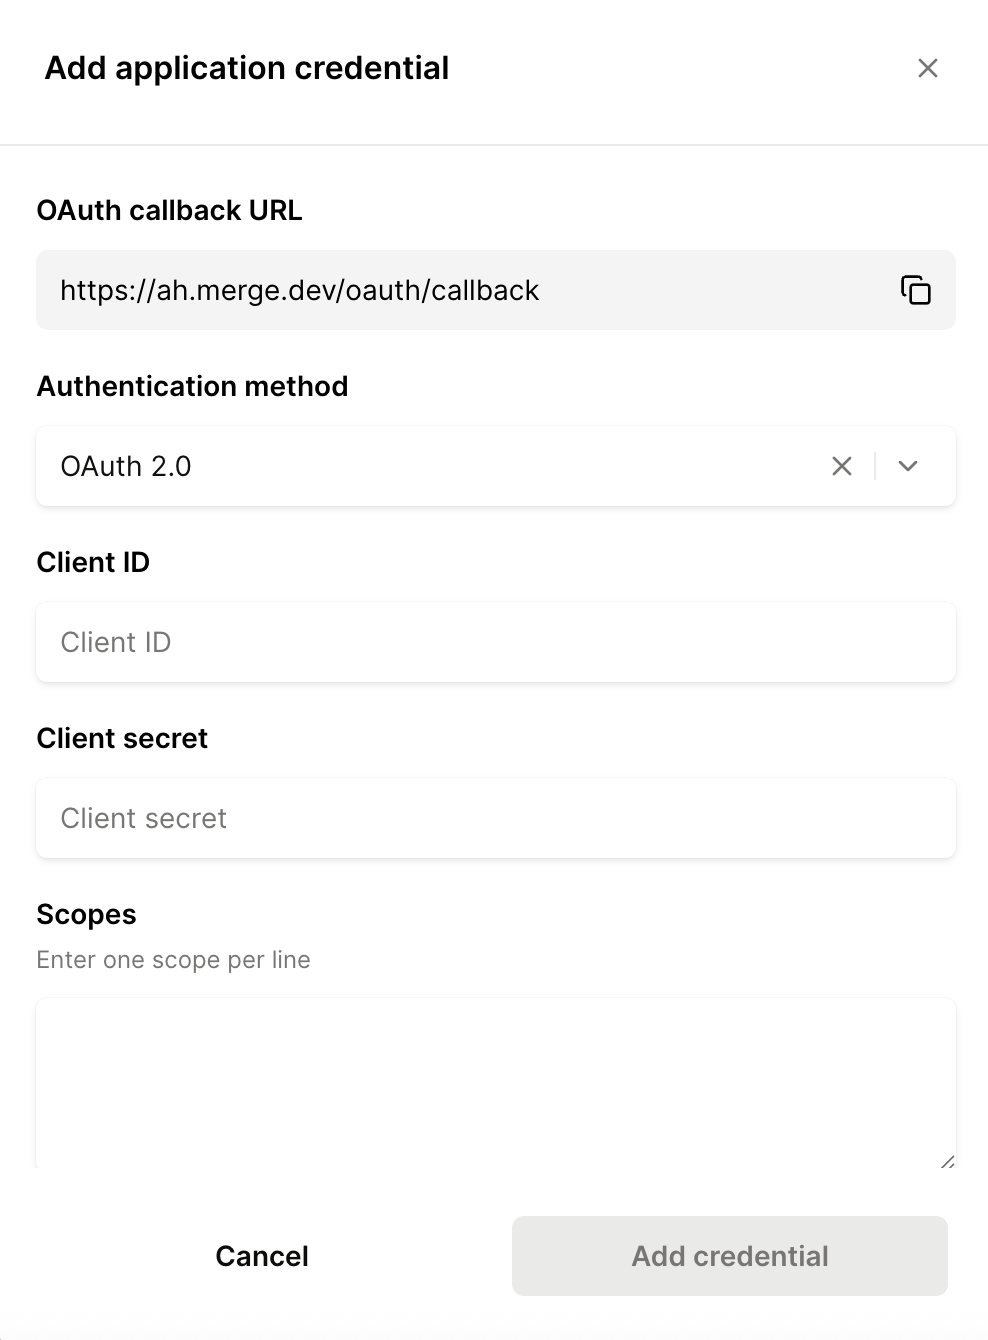
https://ah.merge.dev/oauth/callbackas the Callback URLClick Save
Step 4: Fetch your client ID and Secret
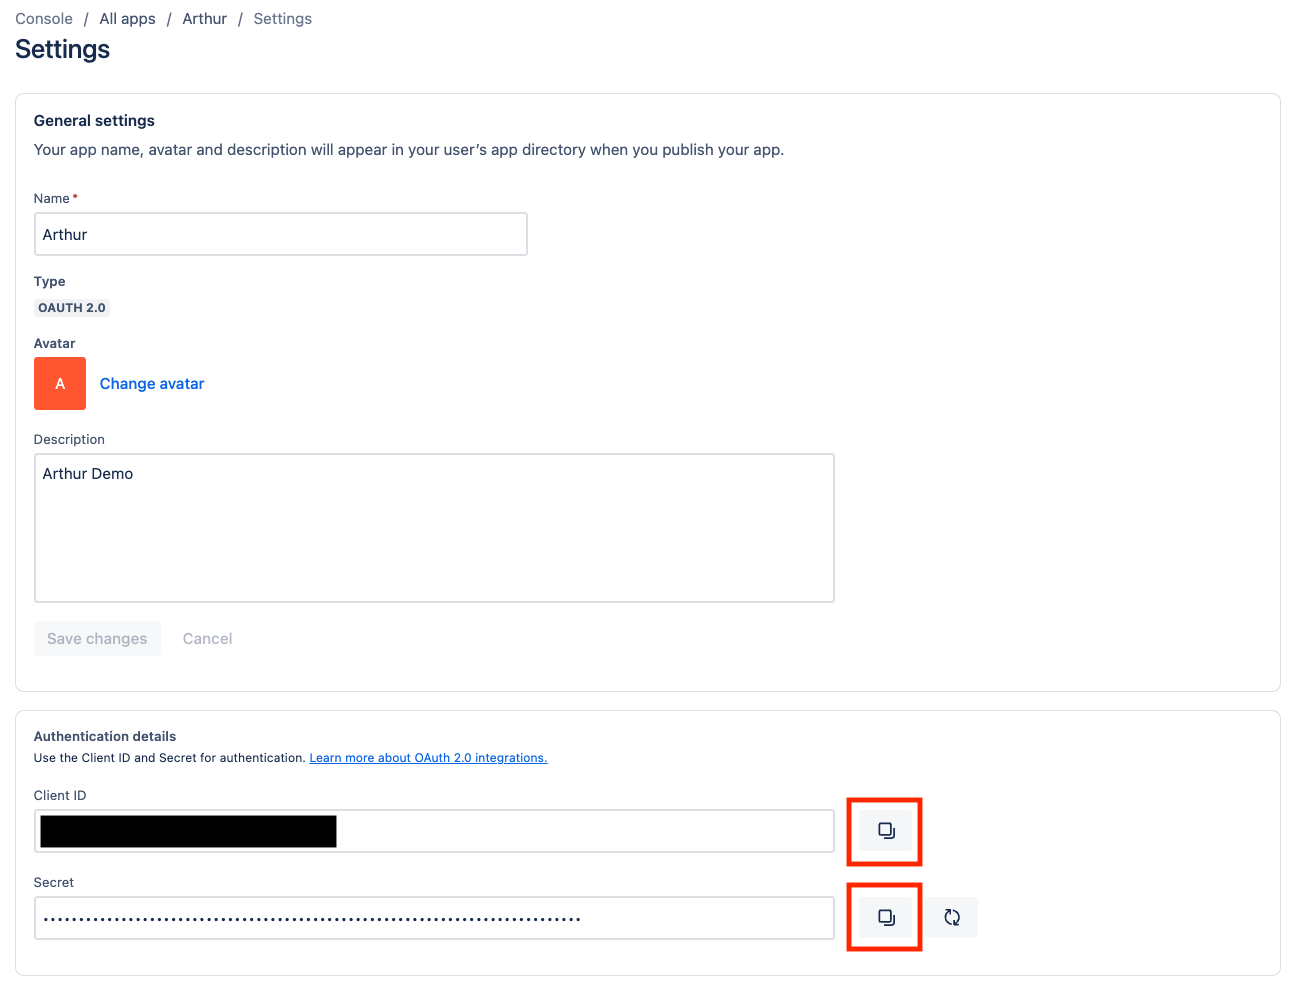
Under the Authentication details section
Copy the Client ID by clicking the Copy icon button next to the value.
Copy the Secret by clicking the Copy icon button next to the value.
Step 5: Populate your app's details within Merge
From the Agent Handler Connectors page, add your client ID and secret to the Jira connector by clicking the "+ Add connector" button.